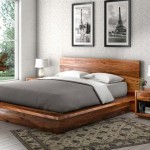
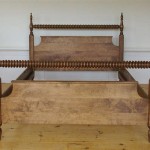
Rustic Queen Bed Frame Plans: A Timeless Guide to Building a Sturdy and Stylish Foundation
Building a rustic queen bed frame from scratch is a rewarding project that adds a touch of timeless elegance and durability to your bedroom. Whether you're a seasoned woodworker or a first-timer seeking a cozy upgrade, these comprehensive plans will guide you through every step of the process.
Before you embark on this exhilarating journey, it's essential to gather the necessary materials. You'll need:
- 4x4 lumber (six 8-foot lengths)
- 2x4 lumber (eight 8-foot lengths)
- Wood screws li>Wood glue
- Clamps
- Sandpaper or sanding sponge
- Finish of your choice (stain, paint, or clear coat)
Building the Headboard and Footboard
1. Cut the 4x4 lumber into the following pieces:
- Two 56-inch pieces
- Two 28-inch pieces
- Two 34-inch pieces
Creating the Side Rails
1. Cut the 2x4 lumber into the following pieces:
- Two 76-inch pieces
- Two 60-inch pieces
Assembling the Frame
1. Align the side rails with the headboard and footboard, ensuring the tops are level. Clamp the pieces together and secure them with screws through the side rails into the headboard and footboard.
Finishing Touches
1. Sand the entire frame to smooth any rough edges or splinters. 2. Apply the finish of your choice to protect and enhance the wood's natural beauty. 3. Allow the finish to dry thoroughly before placing your mattress and bedding on your newly built rustic queen bed frame.
Additional Tips for Customization
- For a more personalized touch, add decorative details such as carved designs, metal accents, or barn door hardware.
- Consider the height of your mattress when determining the length of the side rails. For a standard mattress, a height of 8 inches is suitable.
- Use pressure-treated lumber if you plan to place the bed frame outdoors or in areas exposed to moisture.

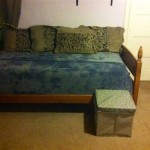
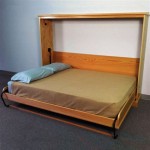
Queen X Barn Door Farmhouse Bed Plan Her Tool Belt

14 Easy Diy Rustic Bedframes Pickled Barrel

Diy Farmhouse Bed Queen Version Frame Rustic

Diy Modern Rustic Bed Frame Build Plans Based On The West Elm Alexa Green Willow Homestead

Queen X Barn Door Farmhouse Bed Plan Her Tool Belt

Diy Full Or Queen Size Storage Bed Shanty 2 Chic

Diy Farmhouse Bed Queen Version Edhart Me

Queen X Barn Door Farmhouse Bed Plan Her Tool Belt

Rustic Bed Frame With Beveled Posts Wood Platform Queen Farmhouse Furniture Reclaimed Barn

Rustic Modern Platform Bed Frame With Headboard All Sizes Ana White