Queen Trundle Bed Plans: An Essential Guide for DIY Enthusiasts
Queen trundle beds, a clever combination of functionality and comfort, are an excellent space-saving solution for guest rooms, children's bedrooms, or cozy corners. Building your own queen trundle bed is an exciting and rewarding task that can not only save you money but also allow you to customize the bed to your specific needs. Here's a comprehensive guide to queen trundle bed plans, covering the essential aspects to guarantee a successful build.
Materials and Tools:
Before embarking on this project, it's crucial to gather the necessary materials and tools. For the frame and base, lumber in the desired wood species (e.g., pine, oak, mahogany), screws, bolts, L-brackets, and wood glue will be required. For the trundle, casters, plywood, and edge banding will be needed. Additionally, you'll need tools like a saw, drill, screwdriver, level, and measuring tape.
Measurements and Design:
Queen trundle beds typically measure 60" x 80" for the top bed and 54" x 76" for the trundle. However, you can adjust these dimensions to suit your space and requirements. Once you have the desired measurements, sketch out a basic design that includes the frame, slats, and trundle.
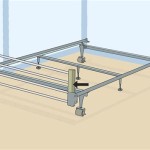
Building the Frame:
Begin by constructing the main frame for the top bed. Cut the lumber to the appropriate lengths, assemble the side and end rails using screws and L-brackets, and reinforce the corners with wood glue. Ensure all connections are sturdy and square.
Installing the Slats:
Next, cut the slats to the width of the frame. These slats will provide support for the mattress. Space the slats evenly and secure them to the frame using screws or nails. Countersink the screws slightly to avoid snagging the mattress.
Building the Trundle:
The trundle, which slides beneath the top bed, can be constructed from plywood. Cut the plywood to the desired dimensions and assemble it into a box using screws and wood glue. Reinforce the corners with L-brackets. Finally, attach casters to the bottom of the trundle for easy rolling.
Finishing:
Sand all the surfaces thoroughly to remove any splinters or rough edges. Apply a coat of primer followed by several coats of your chosen paint or stain. For the trundle, apply edge banding to the exposed edges to conceal the plywood and provide a finished look.

Diy Trundle Bed Anyone Can Make Angela Rose Home

Diy Rolling Trundle Bed Plans Infarrantly Creative

Roll Out Bed Plan In Box Project Trundle Blueprint Bedroom Furniture Diy Folding Frame

Trundle Beds Lignicity Bed Frame Queen Diy

Diy Trundle Bed Anyone Can Make Angela Rose Home

Trundle For Bed Or Storage Ana White

Farmhouse Pallet Bed With Rolling Trundle Infarrantly Creative

How To Build A Queen Bed With Twin Trundle

How To Make A Trundle Bed Queen With Pull Out Underneath Diy Frame Plywood Be

How To Build A Trundle Bed Howtospecialist Step By Diy Plans Frame Murphy