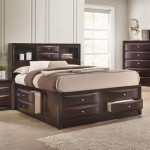
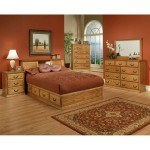
Queen Storage Platform Bed DIY: A Comprehensive Guide
Creating a functional and visually appealing queen storage platform bed is a rewarding DIY project that can transform your bedroom. This comprehensive guide will provide you with detailed instructions, tips, and considerations to ensure a successful outcome.
Materials and Tools
Before starting, gather the necessary materials and tools:
- Queen-sized plywood: 3/4-inch thickness recommended
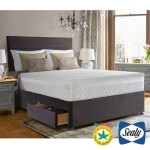
- Mattress and box spring
- 2x8 framing lumber: Enough for side rails and support legs
- 2x6 framing lumber: For headboard and footboard
- Wood screws: 2-inch and 3-inch
- Wood glue
- Circular saw or miter saw
- Drill
- Sander
- Clamps
- Safety glasses
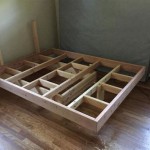
Step 1: Build the Bed Frame
Side Rails: Cut two 2x8 lumber pieces to the length of the plywood. Attach them to the plywood edges using 2-inch wood screws and wood glue. Space them evenly.
Support Legs: Cut six 2x8 lumber pieces to the desired height of the bed platform. Attach them to the corners and center of the bed frame using 3-inch wood screws and wood glue.
Step 2: Create the Storage Area
Determine the desired height of the storage area and cut 2x8 lumber pieces accordingly. Attach them to the inside of the bed frame, parallel to the side rails. Create multiple levels by adding additional 2x8 lumber pieces for shelves or drawers.
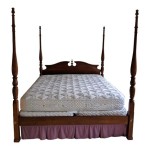
Step 3: Build the Headboard and Footboard
Headboard: Cut a 2x6 lumber piece to the desired width and height of the headboard. Attach it to the end of the plywood opposite the support legs using wood screws.
Footboard: Similarly, cut and attach a 2x6 lumber piece to the end of the plywood adjacent to the support legs.
Step 4: Finishing Touches
Sanding and Staining: Sand the entire bed frame, headboard, and footboard to remove splinters and create a smooth surface. Stain or paint them as desired.
Assembly: Place the mattress and box spring on the platform. Secure the headboard and footboard to the bed frame.
Tips and Considerations
- Use high-quality materials to ensure durability.
- Pre-drill holes before driving screws to prevent splitting.
- Consider adding decorative trim or moldings to enhance the bed's appearance.
- Ensure that the storage area is properly ventilated to prevent moisture buildup.
- Add drawers or shelves to maximize storage space.
- Customize the design to suit your bedroom decor and storage needs.
Conclusion
Building a queen storage platform bed DIY is a satisfying project that provides a comfortable and functional storage solution for your bedroom. By following these instructions and incorporating your own creative flair, you can create a personalized bed that meets all your needs.

How To Build A Queen Size Storage Bed Addicted 2 Diy

Diy Platform Bed With Storage Modern Builds

Queen Size Platform Bed Frame With Storage Drawers Sawdust Girl

Diy Full Or Queen Size Storage Bed Shanty 2 Chic

How To Build A Queen Size Storage Bed Addicted 2 Diy

Full Size Bed Designs Diy Storage Platform Frame

How To Build A Queen Size Storage Bed Addicted 2 Diy

Classic Storage Bed Queen Ana White

Diy Queen Bed Frame With Storage Plans Wilker Do S

35 Diy Platform Beds For An Impressive Bedroom Bed With Storage
Related Posts