Essential Aspects of Queen Size Sleigh Bed Plans
Crafting a queen-size sleigh bed is a rewarding woodworking project that adds a touch of elegance and comfort to your bedroom. With careful planning and attention to detail, you can create a sturdy and stylish piece of furniture that will last for years to come. Here are some essential aspects to consider when selecting and using queen size sleigh bed plans:
1. Materials Selection
The type of wood you choose for your sleigh bed will impact its durability, appearance, and cost. Hardwoods like oak, maple, and cherry are known for their strength and longevity, while softwoods like pine and fir are more affordable but may require more frequent maintenance. Consider the grain pattern, color, and finish options to match your personal style and décor.
2. Plan Accuracy
Choosing a well-crafted set of plans is crucial for the success of your project. Look for plans that provide clear and detailed instructions, multiple views, and a materials list. Make sure the dimensions are accurate and correspond to a queen-size mattress (60 inches wide x 80 inches long).
3. Joinery Techniques
The strength and durability of your sleigh bed depend on the joinery techniques you use. Common methods include mortise and tenon joints, dovetail joints, and corner blocks. Choose joinery techniques that are appropriate for your skill level and the type of wood you have selected.
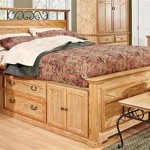
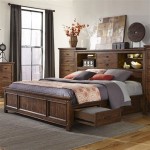
4. Headboard and Footboard Design
The headboard and footboard are the focal points of a sleigh bed. Consider the style and shape that best complements your bedroom décor. You can choose from classic sleigh headboards with curved tops, arched headboards, or more modern and minimalist designs. The footboard can be straight, curved, or have decorative elements.
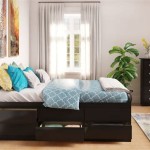
5. Slatted or Solid Base
The base of your sleigh bed can be either slatted or solid. Slatted bases provide ventilation and prevent mattress sagging, while solid bases offer a more traditional look and provide additional support. Choose the base type that best meets your needs and preferences.
6. Finishing Touches
Once your sleigh bed is assembled, you can personalize it with a variety of finishing touches. Sand the wood smooth, apply a stain or paint to match your décor, and consider adding decorative elements such as carvings, moldings, or upholstery.
7. Assembly Tips
Follow the plan instructions carefully and take your time during assembly. Use clamps to hold the pieces securely, and pre-drill pilot holes for screws to prevent splitting. Allow plenty of time for glue to dry completely before applying stress to the joints. With patience and attention to detail, you can create a beautiful and functional queen-size sleigh bed that will be the centerpiece of your bedroom for years to come.

Building A Sleigh Bed Finewoodworking Woodworking Plans Toys

Sleigh Bed Plans Woodplay

Farmhouse Bed Queen Sized Diy Frame Bedding

Queen Size Cherry Sleigh Bed Woodworking Blog S Plans How To

Ediline Wood Sleigh Platform Bed By Inspire Q Classic Bath Beyond 15926243 Murphy Plans

1000 Images About Diy Woodworking Sleigh Bed Plans King Size Storage

Queen Sleigh Bed Makeover Practical Whimsy Designs

Queen Sleigh Bed Makeover Practical Whimsy Designs

21 Marvelous Bedroom Designs With Sleigh Beds Leather Bed Frame Furnishings

Queen Sleigh Bed Makeover Practical Whimsy Designs
Related Posts