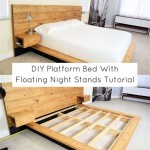
Queen Loft Bed Plans DIY: A Comprehensive Guide
Building a queen loft bed offers a practical solution for maximizing space, especially in smaller rooms. A DIY approach allows for customization and cost savings compared to purchasing a pre-built unit. This guide provides a comprehensive overview of critical considerations and general steps involved in planning and constructing a queen-sized loft bed.
Planning and Design
Careful planning is essential for a successful DIY loft bed project. Begin by determining the available space and desired loft bed dimensions. Consider ceiling height, room layout, and the intended use of the space underneath the loft. Standard queen mattress dimensions are 60 inches wide by 80 inches long. Factor in additional space for framing and desired clearance. A minimum of 30 inches of clearance between the top of the mattress and the ceiling is generally recommended for comfortable sitting.
Material Selection
Choosing the right materials impacts the bed's strength, stability, and overall aesthetic. Common choices include lumber, such as pine, fir, or cedar, for the frame. Select high-quality, straight lumber free from significant knots or warping. Plywood can be used for platforms and support structures. Metal framing is another option, offering high strength and durability but requiring specialized tools and welding skills.
Hardware and Fasteners
The structural integrity of the loft bed relies heavily on proper hardware and fasteners. Use appropriate screws, bolts, and connectors specifically designed for structural applications. Consider using wood glue in conjunction with fasteners for added strength and stability. High-quality hardware ensures the longevity and safety of the finished product.
Safety Considerations
Safety is paramount when designing and building a loft bed. Incorporate sturdy guardrails on all open sides to prevent falls. Ensure the guardrails are securely attached to the frame and high enough to provide adequate protection. The ladder or stairs leading to the loft should be securely fastened and designed for safe and easy access. Weight capacity is a crucial factor. The structure must be designed and built to support the combined weight of the mattress, bedding, and occupants.
Tools and Equipment
Gathering the necessary tools and equipment beforehand ensures a smooth construction process. Essential tools may include a saw (circular saw, miter saw, or hand saw), drill, measuring tape, level, safety glasses, and work gloves. Additional tools like a Kreg Jig can simplify joinery. Access to a workbench or a designated workspace is also beneficial.
Construction Steps
While specific construction steps vary depending on the chosen design, some general principles apply. Begin by building the frame for the loft, ensuring square corners and level surfaces. Next, construct the platform or support structure for the mattress. Attach the guardrails securely to the frame. Finally, build and install the ladder or stairs. Throughout the construction process, double-check measurements and ensure accurate alignment of components.
Finishing Touches
Once the basic structure is complete, consider adding finishing touches to enhance the appearance and functionality. Sanding smooths rough edges and prepares the wood for finishing. Apply a stain or paint to protect the wood and complement the room's décor. Consider adding features like built-in shelving, drawers, or a desk underneath the loft to maximize space utilization.
Design Variations
Numerous design variations cater to individual needs and preferences. A basic loft bed consists of a simple raised platform with supports and a ladder. More complex designs may incorporate built-in storage, desks, or even closet space. Consider incorporating features that align with specific needs and the overall room aesthetic.
Free vs. Paid Plans
Numerous free loft bed plans are available online, offering a starting point for DIY projects. However, these plans may lack detail or customization options. Paid plans often provide more comprehensive instructions, detailed diagrams, and material lists, which can be beneficial for complex designs or those seeking additional guidance.
Seeking Professional Help
While DIY projects can be rewarding, seeking professional help for specific aspects of the project is sometimes advisable. If lacking experience in certain areas, such as electrical wiring for built-in lighting, consulting a qualified professional ensures safety and proper execution.
Building Codes and Regulations
Before starting construction, research local building codes and regulations related to loft beds and other similar structures. Adhering to these codes ensures compliance and contributes to the safety and structural integrity of the finished product. Permitting requirements may vary depending on the location and complexity of the project.

Free Diy Furniture Plans How To Build A Queen Sized Low Loft Bunk Bed The Design Confidential

Queen Loft Bed Plans

Diy Full Size Loft Bed For S With Plans To Build Your Own Simplified Building

Easy Diy Queen Size Loft Bed Plans For S Do It Yourself Plan Kids Bunk Bedroom Instant

Loft Frame Simple Plans Available From Their Site Bed Queen Beds

Loft Bed Build Diy 120 Dollars Queen Size

Diy Queen Loft Bed Frame Plans Rannels Rustic Log Beds Build A Murphy
:max_bytes(150000):strip_icc()/camp-loft-bed-58f6450a3df78ca159f3fc8f.jpg?strip=all)
14 Free Diy Loft Bed Plans For Kids And S

17 Easy Steps For A Diy Built In Bunk Bed Start At Home Decor

How To Build An Easy Diy Queen Size Loft Bed For S Thediyplan


