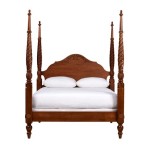
Queen Floating Bed Frame DIY: Elevate Your Bedroom Décor
Enhance the aesthetics and comfort of your bedroom with a DIY queen floating bed frame. This simple yet effective project transforms your bed into a stylish and visually appealing centerpiece, creating an illusion of a floating mattress that adds a touch of serenity and sophistication to your sleeping space.
Materials Required:
- 3/4-inch plywood (4x4 feet) - 2x4 lumber (4 pieces, 6 feet long) - 4x4 lumber (4 pieces, 3 feet long) - 1 5/8-inch pocket hole screws (100-150) - 2 1/2-inch wood screws (50-75) - Wood glue - Brad nails or finish nails - Measuring tape - Drill - Pocket hole jig - Circular saw or miter saw - Sander or sandpaperStep-by-Step Instructions:
1. Build the Platform:Cut two pieces of plywood into 2x4 feet rectangles. These will form the top and bottom of the platform. Assemble them using pocket hole screws and wood glue, leaving a 2-inch overhang on all sides.
2. Build the Side Frames:Cut four pieces of 2x4 lumber into 6-foot lengths. Attach them to the edges of the platform, 1 inch from the sides and spaced evenly apart. Secure them with 2 1/2-inch wood screws.
3. Build the End Frames:Cut four pieces of 4x4 lumber into 3-foot lengths. Attach them to the short ends of the side frames, flush with the edges. Again, use 2 1/2-inch wood screws to secure them.
4. Brace the Corners:Cut small triangles from the leftover plywood to create corner braces. Attach them to the inside corners of the frame using brad nails or finish nails.
5. Sand and Finish:Smooth out any rough edges by sanding the frame. Apply paint, stain, or polyurethane to match your décor.
6. Attach the Bed Slats:Place the bed frame onto the bed and mark the locations for the bed slats. The slats should be spaced evenly apart and run perpendicular to the side frames. Secure them using 2 1/2-inch wood screws.
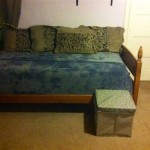
7. Enjoy Your Masterpiece:Congratulations! You've successfully built your DIY queen floating bed frame. Now, place your mattress on top and enjoy the effortless style and comfort it brings to your bedroom.
Tips:
- Use a high-quality plywood for durability and stability. - Ensure your measurements are accurate before cutting any pieces. - Pre-drill holes for all screws to prevent splitting. - If desired, you can add LED lights under the frame for a touch of ambiance. - Embrace the imperfections that come with a DIY project; they add character and charm.
Diy Queen Size Floating Bed Howtospecialist How To Build Step By Plans Frame

How To Build A Diy Floating Bed For Queen Size Mattress Thediyplan

Floating Bed For Queen Size Mattress Thediyplan

Diy Queen Size Floating Bed Howtospecialist How To Build Step By Plans

Diy Floating Bed Frames How To Design Plan And Build Them From Scratch

Floating Queen Size Platform Bed Plans Howtospecialist How To Build Step By Diy Frame

Floating Queen Size Platform Bed Plans Howtospecialist How To Build Step By Diy Frame

Queen Size Floating Bed Plans

How To Make A Floating Bed Time Lapse

King Size Floating Bed Frame Easily Build Your Own