Kira Queen Storage Bed Assembly Instructions Guide
Assembling your Kira Queen Storage Bed is a straightforward process that can be completed in a few hours with the right tools and a little patience. Read on for detailed instructions to guide you through the assembly process step by step.
Step 1: Gather Tools and Identify Parts
Before you begin assembly, ensure you have all the necessary tools, including a Phillips head screwdriver, a hammer, and a rubber mallet. Carefully unpack the box and identify all the components using the provided parts list. Make sure all parts are accounted for.
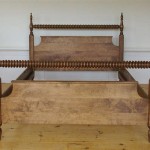
Step 2: Assemble the Headboard and Footboard
Start by attaching the side rails to the headboard and footboard using the provided bolts and washers. Align the holes and tighten the bolts securely. Next, connect the headboard and footboard by inserting the bolts through the pre-drilled holes and tightening them.
Step 3: Attach the Side Rails
Position the side rails parallel to each other, with the pre-drilled holes facing outward. Lift the headboard and footboard assemblies onto the side rails and align the holes. Secure the rails to the headboard and footboard using the bolts and washers.
Step 4: Install the Slats
Lay the provided bed slats across the side rails, ensuring they fit snugly into the pre-cut grooves. Space the slats evenly apart for optimal support.
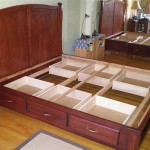
Step 5: Assemble the Storage Drawers
Gather the drawer components and assemble the drawers according to the manufacturer's instructions. Each drawer typically consists of a base, side panels, back panel, and drawer front. Attach the drawer slides to the drawer base and side rails.
Step 6: Insert the Drawers
Lift each assembled drawer and slide it into the designated storage compartment. Ensure the drawer slides engage smoothly and the drawer opens and closes effortlessly.
Step 7: Attach the Drawer Fronts
Align the drawer fronts with the corresponding drawers and secure them using the provided screws. Ensure the drawer fronts are flush with the bed frame.
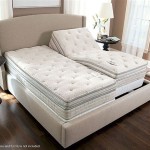
Step 8: Final Assembly and Inspection
Double-check all connections and ensure the bed is assembled securely. Tighten any loose bolts or screws. Place the mattress on the bed frame and enjoy your new Kira Queen Storage Bed.
Tips for Successful Assembly
Take your time and follow the instructions carefully.
Use the correct tools for the job.
Double-check all connections before tightening any screws or bolts.
If you encounter any difficulties, refer to the manufacturer's website or contact customer support.
Your Kira Queen Storage Bed is now assembled and ready to provide you with comfortable sleep and ample storage space. Enjoy the convenience and functionality it offers.

B473 77 Ashley Furniture Kira Bedroom Full Storage Bed

Ashley Bed Components Kira B473 65 Queen Storage Headboard From Rapid Als

Ashley B476 64 Caitbrook Queen Storage Drawers Instruction Manual

Kira Queen Bed Frame Single Katil Kayu Be Wood Lazada

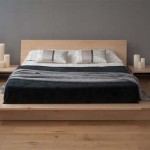
Kira Solid Wood Low Profile Platform Bed Warranty Length 5 Years 6 Com

Round Hill Furniture Queen Storage Bed Emily B11sqhf Unboxing Assembly Install

Upholstered Leather Storage Bed Assembly Instructions

Stickon 84 4 In W Beige Velvet Wood Frame Queen Size Platform Bed With Upholstered Hym Hd04282487 The Home Depot

Zinus Tonja Wood Platform Bed Frame With Headboard Assembly Kira Solid
Related Posts