How to Construct a Sturdy Queen-Size Platform Bed Frame
Constructing a queen-size platform bed frame is a rewarding project for any DIY enthusiast. Not only will you save money compared to purchasing a pre-made frame, but you'll also have the satisfaction of creating a piece that meets your exact specifications. In this comprehensive guide, we'll break down the process into simple, step-by-step instructions so that you can build your own sturdy platform bed frame with confidence.
Materials and Tools Required
Before starting, gather the necessary materials and tools for this project:
- 2 × 4 lumber (approximately 12 pieces)
- Corner brackets
- Lag bolts
- Wood screws
- Drill with drill bits
- Circular saw or miter saw
- Measuring tape
- Level
Step 1: Cut the Frame Support Pieces
Begin by cutting the frame support pieces. You'll need four pieces of 2 × 4 lumber cut to a length of 76 inches. These will form the side rails of the frame.
Step 2: Assemble the Side Rails
Align the side rails at right angles and secure them with corner brackets. Reinforce the joints by drilling pilot holes and inserting lag bolts.
Step 3: Cut and Assemble the Footboard and Headboard
Cut the footboard and headboard pieces to a length of 60 inches from the 2 × 4 lumber. Assemble them in the same manner as the side rails, using corner brackets and lag bolts for added strength.
Step 4: Attach the Footboard and Headboard to the Frame
Center the footboard and headboard on the side rails and secure them using wood screws. Drive the screws through the brackets into the rails to ensure a stable connection.
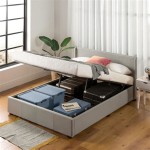
Step 5: Construct the Slat Support
To support the mattress, cut additional 2 × 4 lumber pieces to a length of 59 inches. These will act as slats and distribute the weight of the mattress evenly. Position the slats at regular intervals along the side rails and secure them with wood screws.
Step 6: Reinforce the Frame (Optional)
For added stability, you can reinforce the frame by installing center supports. Cut two additional 2 × 4 lumber pieces to a length of 28 inches. Place them perpendicularly to the side rails and secure them with lag bolts.
Step 7: Finishing Touches
Sand any rough edges on the frame and apply a stain or paint of your choice to match your bedroom décor. Consider adding felt pads to the bottom of the frame to protect your flooring.
Conclusion
With these instructions, you now have the knowledge to build a sturdy and stylish queen-size platform bed frame that will provide years of restful sleep. Remember to take your time, measure carefully, and don't hesitate to seek assistance if needed. By completing this project, not only will you have saved money and gained a sense of accomplishment, but you'll also have created a piece of furniture that reflects your personal taste and enhances the comfort of your bedroom.

How To Build A Modern Platform Bed For 125 Diy Beautify Creating Beauty At Home

How To Build A Modern Platform Bed For 125 Diy Beautify Creating Beauty At Home

Diy 5 Minutes Bed Frame

Diy Full Or Queen Size Storage Bed Shanty 2 Chic

How To Build A Queen Size Storage Bed Addicted 2 Diy

Easy Diy Platform Bed Frame For A King With Instructions

How To Build A L Shaped Desk Mid Century Modern Diy Builds

How To Build A Modern Platform Bed For 125 Diy Beautify Creating Beauty At Home

How To Make Queen Size Platform Bed Part 2 Of 3 Outer Frame And Headboard Jordswood

How To Make A Diy Platform Bed Lowe S