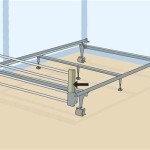
How to Construct a Majestic Queen-Sized Bed Frame
A comfortable and stylish bed frame is essential for a restful night's sleep. Crafting your own queen-size bed frame can be a fulfilling project, adding a touch of personal flair to your sleeping quarters. This comprehensive guide will walk you through the essential steps to create a sturdy and aesthetically pleasing frame that will enhance your bedroom décor.
Materials Required:
* Pine lumber: 2x4s, 2x6s, 4x4s * Plywood: 1/2-inch or 3/4-inch * Wood screws: 2-inch, 2-1/2-inch, 3-inch * Wood glue * Miter saw or circular saw * Drill * Countersink bit * Sander or sandpaper * Wood stain or paint (optional) * Mattress support system (slats or box spring)Step 1: Plan and Measure
Determine the dimensions of your desired bed frame. A queen-size mattress typically measures 60 inches wide and 80 inches long. To accommodate the mattress and box spring, add 2 inches to the width and 5 inches to the length. Mark these measurements on your lumber accordingly.
Step 2: Create the Side Rails
Cut four 2x6s to the length of the bed frame minus the head and foot rails. These will form the side rails. Cut four 2x4s to the height of the bed frame. These will serve as the legs for the side rails.
Step 3: Assemble the Head and Foot Rails
For the head and foot rails, cut four 2x6s to the width of the bed frame. Cut four 2x4s to the height of the bed frame. Attach the 2x6s to the 2x4s using wood glue and 2-inch screws.
Step 4: Join the Side and Head/Foot Rails
Align the side rails with the head and foot rails, forming a rectangular frame. Securely attach them using 2-1/2-inch screws driven through the side rails into the head and foot rails.
Step 5: Install the Legs
Position the 2x4 legs along the inside of the side rails, flush with the top and bottom. Attach them using 3-inch screws. Countersink the screws for a smooth finish.
Step 6: Reinforce the Joints
For added stability, install diagonal braces between the legs and side rails. Cut 2x4s to the appropriate length and secure them with 2-1/2-inch screws.
Step 7: Build the Plywood Base
Cut a piece of plywood to the interior dimensions of the bed frame. Attach it to the frame using 2-inch screws every 6-8 inches.
Step 8: Finishing Touches
Sand the entire frame to remove any rough edges. Apply wood stain or paint to match your décor. Add a mattress support system, whether it be slats or a box spring. Finally, place your mattress and enjoy your handcrafted queen-size bed frame.

Diy Bed Frame Wood Headboard 1500 Look For 200 A Piece Of Rainbow

Diy Bed Frame Wood Headboard 1500 Look For 200 A Piece Of Rainbow

Queen X Barn Door Farmhouse Bed Plan Her Tool Belt

Simple Queen Bed Frame Diy Plans

How To Build A L Shaped Desk Mid Century Modern Diy Builds

Essential Platform Bed Frame Ana White

Diy Bed Frame Wood Headboard 1500 Look For 200 A Piece Of Rainbow

Diy Full Or Queen Size Storage Bed Shanty 2 Chic

Diy Bed Frame Plans How To Make A With Pete

How To Make A Queen Sized Bed For Under 30
Related Posts


