How To Make A Queen Bunk Bed
Building a queen-size bunk bed requires careful planning and execution. This project demands a higher level of skill and precision compared to building a standard twin-size bunk bed due to the increased weight and size involved. A thorough understanding of woodworking techniques, including accurate measurements, precise cutting, and proper joint assembly, is essential for a safe and stable structure.
The first step involves meticulous planning. Begin by creating a detailed design, including precise measurements for all components. Consider the overall height, width, and length of the bed frame, ensuring it fits comfortably within the designated space. Account for ceiling height and any potential obstructions, such as light fixtures or ceiling fans. A well-defined plan minimizes errors during the construction process. This plan should also include a comprehensive list of required materials and tools.
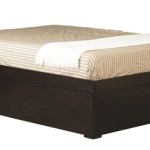
Material selection is crucial for safety and durability. High-quality lumber, such as kiln-dried pine or cedar, is recommended for its strength and resistance to warping. The lumber dimensions will depend on the specific design, but common sizes for the posts and frame typically range from 4x4 inches to 6x6 inches. Select sturdy plywood for the bed platforms, ensuring it's thick enough to support the weight of the mattresses and occupants. Choose appropriate screws and bolts, opting for heavy-duty fasteners designed for structural applications.
Gather the necessary tools. Essential tools include a circular saw or miter saw for cutting lumber, a drill with various drill bits, a measuring tape, a level, a square, safety glasses, and work gloves. Other helpful tools include a Kreg Jig for pocket hole joinery, a wood clamp, and a sander. Having the right tools readily available streamlines the building process.
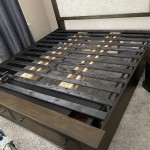
Construction typically begins with building the bed frame. Cut the lumber according to the measurements specified in the design plan. Assemble the frame using appropriate joinery techniques, such as mortise and tenon joints, dowel joints, or pocket hole joinery. Ensure the frame is square and level throughout the assembly process. Use wood glue in conjunction with screws or bolts to strengthen the joints. Reinforce the corners with corner braces for added stability. This frame serves as the foundation for the entire structure.
Next, build the support system for the upper bunk. This typically involves installing a series of support slats or a solid plywood platform. The support system should be securely attached to the side rails of the bed frame. Ensure adequate spacing between the slats for proper mattress ventilation. If using a plywood platform, ensure it's securely fastened to the frame with screws or bolts.
Construct the guardrails for the upper bunk. These are critical for safety and should be high enough to prevent falls. Attach the guardrails securely to the bed frame using screws and bolts. Consider adding vertical slats or a solid panel to the guardrails for added security. Ensure the guardrails are sturdy and capable of withstanding potential impacts.
Build the ladder. Cut the ladder stiles and rungs to the appropriate lengths. Attach the rungs to the stiles using screws or dowels, ensuring they are evenly spaced and securely fastened. The ladder should be angled appropriately for safe and comfortable climbing. Consider adding non-slip treads to the rungs for added safety.
Once the main structure is complete, add the finishing touches. Sand all surfaces smooth to remove any splinters or rough edges. Apply a finish, such as paint or stain, to protect the wood and enhance its appearance. Allow the finish to dry completely before adding the mattresses and bedding.
Regular maintenance is essential for ensuring the long-term safety and stability of the bunk bed. Periodically inspect the frame, joints, and hardware for any signs of wear or damage. Tighten any loose screws or bolts. Re-apply the finish as needed to protect the wood from moisture and wear. Regular maintenance can prevent potential hazards and extend the lifespan of the bunk bed.
Safety should be the top priority throughout the entire construction process and beyond. Ensure the bunk bed is placed on a level surface and away from windows or ceiling fans. Use appropriate mattresses that fit snugly within the frame and do not exceed the recommended thickness. Educate users about safe practices, such as avoiding horseplay on the upper bunk and using the ladder properly. Adhering to these safety guidelines can help prevent accidents and injuries.
Building a queen-size bunk bed is a complex project that requires careful planning, accurate measurements, and precise execution. By following these steps and prioritizing safety, a sturdy and functional bunk bed can be created that provides a comfortable and space-saving sleeping solution.

17 Easy Steps For A Diy Built In Bunk Bed Start At Home Decor

Queen Builtin Bunks Reveal Honey Built Home

17 Easy Steps For A Diy Built In Bunk Bed Start At Home Decor

Queen Builtin Bunks Reveal Honey Built Home

17 Easy Steps For A Diy Built In Bunk Bed Start At Home Decor

Twin Over Queen Loft Mod Ana White

Diy Queen Over Loft Bed Plan Step By Guide For

Queen Over Perpendicular Timber Bunk Custom Beds Bed Plans Diy

How To Build An Easy Diy Queen Size Loft Bed For S Thediyplan

Free Diy Furniture Plans How To Build A Queen Sized Low Loft Bunk Bed The Design Confidential