How to Make a Headboard for a Queen Size Bed
A headboard is a decorative and functional addition to any bed, and it can be a great way to add your own personal style to your bedroom. If you're looking for a way to upgrade your bed without spending a lot of money, making your own headboard is a great option. Here's a step-by-step guide on how to make a headboard for a queen size bed:
Materials:
* 1 sheet of 4'x8' plywood (3/4" thick) * 1 can of wood filler * 1 quart of paint or stain * 1 paintbrush or roller * 1 staple gun * 1 yard of fabric * 1 piece of batting (optional) * 1 set of upholstery tacks * A hammer * A drill * A saw * A measuring tape * A pencilInstructions:
1.Cut the plywood to size.
The first step is to cut the plywood to the desired size of your headboard. For a queen size bed, the headboard should be 60 inches wide and 36 inches tall. Use a saw to cut the plywood to the correct dimensions. 2.Sand the plywood.
Once the plywood is cut to size, sand it smooth. This will help to remove any splinters or rough edges. 3.Fill in the nail holes.
If there are any nail holes in the plywood, fill them in with wood filler. This will help to create a smooth surface for painting or staining. 4.Paint or stain the plywood.
Once the wood filler is dry, you can paint or stain the plywood. If you're painting the plywood, use a paintbrush or roller to apply the paint evenly. If you're staining the plywood, use a cloth to apply the stain evenly. 5.Upholster the headboard (optional).
If you want to upholster the headboard, you'll need to purchase some fabric and batting. Cut the fabric to the desired size, and then wrap it around the headboard. Staple the fabric in place, and then trim any excess fabric. If you're using batting, place it between the fabric and the headboard before stapling. 6.Add upholstery tacks (optional).
If you're upholstering the headboard, you can add upholstery tacks to give it a more finished look. Hammer the tacks into the fabric, spacing them evenly apart. 7.Attach the headboard to the bed.
Once the headboard is finished, you can attach it to the bed. Use the drill to make holes in the headboard, and then use the screws to attach the headboard to the bed frame.Tips:
* If you're not sure what size headboard you want, measure your bed first. The headboard should be about 6 inches wider than the bed, and it should be about 1/3 to 1/2 the height of the bed. * You can use any type of fabric to upholster your headboard. However, if you're using a fabric that's prone to wrinkles, you may want to use a layer of batting between the fabric and the headboard. * If you're not comfortable using a staple gun, you can also use upholstery tacks to attach the fabric to the headboard. * You can add any type of decorative details to your headboard, such as trim, paint, or fabric appliqués.
15 Diy Headboard Ideas How To Make A

How To Upholster A Headboard For Beginners

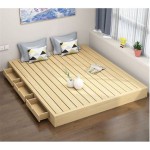
Diy Bed Frame Wood Headboard 1500 Look For 200 A Piece Of Rainbow

Easy Build Wood Headboard All Mattress Sizes Ana White

Diy Upholstered Wingback Headboard Handmade Weekly

15 Diy Headboard Ideas How To Make A
:max_bytes(150000):strip_icc()/diy-59f21039054ad90010815556.jpg?strip=all "14 Diy Wood Headboards")
14 Diy Wood Headboards

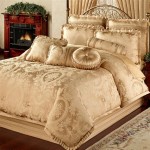
50 Best Diy Headboard Ideas Upcycled

Diy Bed Frame Wood Headboard 1500 Look For 200 A Piece Of Rainbow

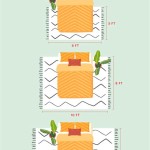
Here S How To Make A Full Size Headboard Fit Queen Bed