How To Make A Bunk Bed With Desk Underneath
Building a bunk bed with a desk underneath is a rewarding project that can maximize space and functionality in a room. This comprehensive guide outlines the steps involved in creating a sturdy and practical bunk bed with an integrated desk.
Planning and Design
Careful planning is crucial for a successful outcome. Begin by determining the dimensions of the bunk bed, considering the available space and the users' needs. Sketch a detailed design, including accurate measurements for the frame, ladder, desk, and guardrails. Factor in the mattress size and the desired desk height and width. Specifying material choices, such as lumber type and hardware, during this stage streamlines the building process.
Material Gathering and Preparation
Acquire all necessary materials based on the finalized design. Lumber, commonly pine or fir, should be straight and free from knots. Purchase high-quality screws, bolts, and other hardware designed for furniture construction. Sand all lumber pieces thoroughly to create a smooth surface for finishing and to ensure user safety. Measure and mark cut lines on the lumber according to the design plan, double-checking all measurements for accuracy.
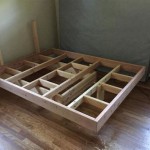
Frame Construction
Begin by constructing the individual bed frames. Cut the lumber to the designated lengths for the posts, side rails, and support slats. Assemble the frames using screws and wood glue, ensuring square corners and a stable structure. Reinforce joints with metal brackets or corner braces for added durability. The lower bed frame should incorporate supports for the desk surface.
Desk Integration
Once the lower bed frame is complete, build the desk structure. Cut the desktop to the desired size and attach it securely to the supports on the lower bed frame. Consider adding drawers or shelves underneath the desk for additional storage. Ensure the desk height allows for comfortable seating and legroom.
Ladder Construction and Attachment
Build a sturdy ladder from pre-cut or custom-made rungs and side rails. Securely attach the ladder to the upper bunk frame using bolts and screws. Ensure the ladder angle allows for safe and comfortable climbing. Consider adding a handrail for enhanced safety, especially for younger users.
Guardrail Installation
Install guardrails on the upper bunk for safety. The guardrails should be high enough to prevent falls. Securely attach them to the bed frame with screws and bolts. Ensure the spacing between the rails is not wide enough to allow a child's head to pass through.
Finishing
Sand all surfaces smooth and apply a finish of your choice. Paint, stain, or clear coat can protect the wood and enhance the appearance of the bunk bed. Ensure the chosen finish is non-toxic and suitable for children's furniture. Allow ample drying time between coats.
Final Assembly and Inspection
Assemble the completed upper and lower bunk frames, securing them together with appropriate hardware. Ensure all joints are tight and the structure is stable. Carefully inspect the entire bunk bed for any sharp edges, protruding screws, or other potential hazards. Test the stability of the ladder and guardrails before use.
Safety Considerations
Adherence to safety guidelines throughout the construction process is paramount. Use appropriate safety equipment, including eye protection and gloves. Choose sturdy materials and hardware. Ensure the bed frame is robust enough to support the intended weight. Regularly inspect the bunk bed for any signs of wear and tear and address them promptly.

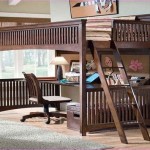
Making A Diy Loft Bed With Desk Pro Tool Reviews

How To Build A Loft Bed With Desk And Storage Diy

How To Build A Loft Bed With Desk And Storage Diy

Making A Diy Loft Bed With Desk Pro Tool Reviews

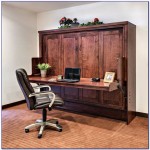
Loft Beds With Desk Turn Your Bedroom Into An Efficient Work Station

Loft Beds With Desks Underneath Bunk Bed Desk

Pin On Oaklee

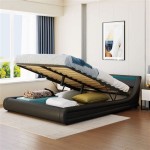
How To Build A Diy Queen Size Loft Bed With Desk Thediyplan

Loft Beds With Desk Turn Your Bedroom Into An Efficient Work Station

Loft Beds With Desks Underneath 30 Design Ideas Enigmatic Touch