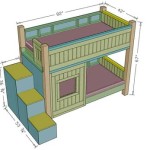
How to Install a Murphy Bed Mechanism: A Step-by-Step Guide
Murphy beds, also known as wall beds, offer a space-saving solution for homes and apartments. Installing the mechanism can seem daunting, but with careful planning and execution, it's a manageable DIY project. This guide provides a comprehensive walkthrough of the installation process.
Planning and Preparation
Before beginning the installation, meticulous planning is crucial. This involves several key steps:
1. Choose the right Murphy bed mechanism: Mechanisms vary in size, weight capacity, and features. Select one that fits the bed dimensions and intended use.
2. Verify wall suitability: Ensure the chosen wall can support the combined weight of the bed frame, mattress, and mechanism. Consult a structural engineer if necessary.
3. Gather necessary tools and materials: Having all tools readily available streamlines the process. This typically includes a drill, screwdriver, level, measuring tape, stud finder, appropriate screws and fasteners, and safety glasses.
4. Study the manufacturer’s instructions: Each mechanism comes with specific instructions. Familiarize yourself with these before starting.
5. Prepare the installation area: Clear the area around the wall and ensure adequate lighting for optimal visibility.
Assembling the Murphy Bed Frame
With the preparatory steps completed, the next stage involves assembling the bed frame. This is often easier with an assistant.
1. Lay out all frame components: Organize all parts of the bed frame according to the manufacturer's instructions to avoid confusion during assembly.
2. Connect frame pieces: Using appropriate screws and fasteners, securely connect the frame pieces following the provided instructions. Ensure all joints are aligned and tightened correctly.
3. Attach the mattress supports: Securely attach the slats or platform that will support the mattress to the bed frame.
4. Inspect the assembled frame: Before proceeding, double-check all connections to ensure structural integrity.
Mounting the Murphy Bed Mechanism to the Wall
Mounting the mechanism securely to the wall is the most critical step in the installation process.
1. Locate and mark wall studs: Use a stud finder to locate and mark the wall studs where the mechanism will be attached. This ensures the bed is anchored to a solid structure.
2. Position the Murphy bed mechanism: Carefully position the mechanism against the wall, aligning it with the marked studs.
3. Attach the mechanism to the wall: Using appropriate screws and fasteners, secure the mechanism to the wall studs, ensuring it is level both vertically and horizontally.
4. Reinforce mounting points (if necessary): Depending on the weight of the bed and the wall construction, additional reinforcement may be required. Consult the manufacturer's instructions for specific recommendations.
Connecting the Bed Frame to the Mechanism
Once the mechanism is securely mounted, the bed frame can be attached.
1. Align the bed frame with the mechanism: Carefully lift and align the assembled bed frame with the mounting points on the mechanism.
2. Secure the frame to the mechanism: Following the manufacturer's instructions, use the provided hardware to attach the bed frame securely to the mechanism. Ensure all connections are tight and stable.
3. Test the mechanism: Carefully lower and raise the bed frame a few times to check the smooth operation of the mechanism and ensure all components are working correctly.
Installing the Leg System
The leg system is essential for supporting the bed when it is in the lowered position.
1. Attach the legs to the bed frame: Following the manufacturer's instructions, attach the folding legs or support system to the bed frame.
2. Test leg deployment: Lower the bed fully and ensure the legs deploy correctly and provide stable support.
Final Adjustments and Safety Checks
After installing the primary components, final adjustments and safety checks are crucial.
1. Adjust the spring tension (if applicable): Some mechanisms allow for spring tension adjustment. Adjust this to ensure the bed raises and lowers smoothly and safely.
2. Check for smooth operation: Raise and lower the bed several times to verify the smooth operation of the mechanism and ensure there are no obstructions or binding points.
3. Inspect all connections: Double-check all screws, bolts, and fasteners to ensure they are tightened securely.
4. Install safety features (if included): Some Murphy bed mechanisms include safety features like locking mechanisms or straps. Install and test these according to the manufacturer’s instructions.
Adding the Finishing Touches
With the mechanism installed and tested, the final touches can be added.
1. Install the mattress: Carefully place the mattress onto the bed frame.
2. Add bedding and pillows: Dress the bed with bedding and pillows.
3. Consider cabinet installation (optional): Many Murphy beds are integrated into cabinets for a more finished look. If applicable, install the cabinet components according to the manufacturer’s instructions.

Diy Murphy Wall Bed 5 Springs Mechanism Hardware Kit Fold Down For 0 9 1 2m Hm117 In Cabinet H Beds

Murphy Bed Mechanism Installation Steps

Installation Murphy Bed Mechanism Diy

Murphy Bed Mechanism Installation Steps

Murphy Bed Mechanism Installation Steps

Modern Murphybed Mechanism Wallbed Wilding Wallbeds

Murphy Bed Mechanism Installation Steps

Do It Yourself Murphy Bed Kit Now Wilding Wallbeds

Beta Bed Universal Murphy Kit For Single Double Or King

Spring Driven Wall Bed Mechanism Murphy Superwallbed Com