How To Build Bunk Beds Twin Over Queen: A Comprehensive Guide
Building bunk beds can be a fun and rewarding project, but it's crucial to approach it with the necessary knowledge and preparation. This comprehensive guide will provide you with step-by-step instructions on how to build sturdy and reliable twin over queen bunk beds, ensuring a comfortable and safe sleeping arrangement for your family.
Materials You'll Need:
- Pine or hardwood lumber (2x4s, 2x6s, 2x8s)
- Plywood (3/4-inch or thicker)
- Mattresses (twin size for top bunk, queen size for bottom bunk)
- Wood screws (2-inch, 3-inch, and 4-inch)
- Washers and nuts (for bed slats)
- Corner braces
- Sandpaper
- Wood stain or paint
Tools Required:
- Circular saw
- Drill
- Impact driver or screwdriver
- Measuring tape
- Level
- Clamps
- Sanding block
Step 1: Cut the Lumber
Begin by cutting the lumber according to the following dimensions:
- 2x6s for the legs: 6 pieces at 66 inches long
- 2x4s for the sides: 8 pieces at 76 inches long
- 2x8s for the headboard and footboard: 2 pieces at 60 inches long
- 2x4s for the bed slats: 14 pieces at 72 inches long
Step 2: Assemble the Frame
Join the legs and sides using 3-inch wood screws. Create two rectangular frames, each measuring approximately 76 inches long by 66 inches wide. Connect the headboard and footboard to the sides using 2-inch wood screws.
Step 3: Install the Bed Slats
Drill pilot holes in the sides of the frame and insert washers. Place the bed slats on the washers and secure them with nuts. Ensure even spacing and support for the mattresses.
Step 4: Build the Ladder
Cut 2x4s for the ladder rungs and legs. Assemble the ladder by attaching the rungs to the legs with 3-inch wood screws. Secure the ladder to the frame using corner braces.
Step 5: Cut the Plywood
Cut two pieces of plywood to fit the dimensions of the queen mattress (60 inches wide by 80 inches long). These will serve as the surface for the top and bottom bunks.
Step 6: Secure the Plywood
Place the plywood on the bed slats and secure it using 1-inch wood screws. Countersink the screws slightly to create a flush surface.
Step 7: Finishing Touches
Sand any rough edges or splinters. Apply wood stain or paint to protect the wood and enhance the appearance of the bunk beds. Allow the finish to dry completely.
Tips for Success:
- Use high-quality lumber and hardware for durability.
- Measure and cut precisely to ensure a snug fit of all components.
- Pre-drill pilot holes to prevent wood from splitting.
- Secure all joints with adequate screws and glue for stability.
- Test the strength and stability of the bunk beds before using them.
Conclusion:
Congratulations! You have successfully built a twin over queen bunk bed, providing a practical and comfortable sleep solution for your loved ones. Whether it's for a child's room or a guest bedroom, these bunk beds will bring years of cozy nights and sweet dreams.

Modular Bunk Bed Setup Woodworking Blog S Plans How To Diy Cool Beds

17 Easy Steps For A Diy Built In Bunk Bed Start At Home Decor

Queen Builtin Bunks Reveal Honey Built Home

Simple Bunk Bed Plans Twin Over Full Ana White

17 Easy Steps For A Diy Built In Bunk Bed Start At Home Decor

How To Build A Built In Bunk Bed Plank And Pillow

Custom Made Twin Over Full Bunk Bed I Don T Like The Posts Going All Way Up D Ladder Built Into Plans Beds

Diy Built In Bunk Beds Lauren Koster Creative

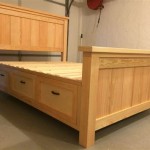
Twin Over Queen Bunk Bed Free Woodworking Plan Com

68 Amazing Diy Bunk Bed Plans