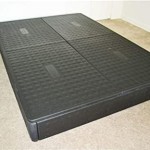
How to Build a Vertical Murphy Bed: A Step-by-Step Guide
Vertical Murphy beds, also known as wall beds, are a clever space-saving solution that can add functionality and style to any room. Whether you live in a studio apartment, a small bedroom, or simply need a way to optimize your living space, building a vertical Murphy bed is a great way to maximize your square footage. Here's a comprehensive guide to help you construct your own custom-made vertical Murphy bed:
Materials and Tools
Before you begin, gather the necessary materials and tools:
- Murphy bed hardware kit (includes brackets, hinges, and piston arms)
- Plywood or MDF for the bed frame and panels
- 2x4 lumber or metal studs for framing
- Wood screws and nails
- Mattress
- Drill and driver
- Circular saw or table saw
- Level
- Tape measure
Step 1: Design and Planning
Start by determining the dimensions of your bed and the location where you want to install it. Ensure the space has enough clearance for both the bed and access to the room when it's folded up. Create a detailed plan that includes the overall dimensions, as well as the sizes of the panels, framing, and hardware components.
Step 2: Building the Frame
Cut the 2x4s or metal studs according to the frame dimensions, and assemble them using wood screws or construction adhesive. Ensure the frame is square and level using a level. Install the Murphy bed hardware brackets on the inside of the frame.
Step 3: Creating the Bed Panels
Cut the plywood or MDF panels to the desired size of the bed. Attach the panels to the frame using wood screws or nails. Ensure the panels are flush with the edges of the frame.
Step 4: Installing the Hinges
Align the Murphy bed hinges with the brackets on the frame and the panels. Attach the hinges using the provided screws.
Step 5: Installing the Piston Arms
Position the piston arms on the frame according to the manufacturer's instructions. Secure the piston arms using screws or bolts. These arms assist in raising and lowering the bed with ease.
Step 6: Attaching the Mattress
Place the mattress on the bed frame. Install any necessary hardware to secure the mattress in place.
Step 7: Finishing Touches
To enhance the aesthetics and durability, consider adding decorative trim or paint to the bed frame. Install handles or knobs for easy access to the bed. Ensure all components are firmly attached and functioning correctly.
Conclusion
Building a vertical Murphy bed is a challenging but rewarding DIY project that can transform your small space into a more functional and stylish environment. By following these steps and paying attention to detail, you can create a custom-made Murphy bed that perfectly fits your needs. Remember, if you encounter any difficulties, don't hesitate to consult with a professional for guidance.

King Size Easy Diy Murphy Bed Hardware

How To Build A Murphy Bed Part 1
Diy Twin Murphy Beds Without Expensive Hardware The Awesome Orange

Plans A Murphy Bed You Can Build And Afford To Ana White

Vertical Murphy Bed Kit

Diy Modern Murphy Bed Huntress

18 Best Diy Murphy Bed Ideas And Designs For 2024

Queen Size Murphy Bed Hardware Kit Vertical Upright Easy Diy
Plans A Murphy Bed You Can Build And Afford To Ana White

Full Double Size Murphy Bed Hardware Kit Vertical Upright Easy Diy


