How to Build a Raised Garden Bed on Sloped Ground
Cultivating a garden on sloped ground presents unique challenges. Soil erosion, uneven water distribution, and difficulty accessing the planting area are just a few obstacles. However, with the right approach, you can transform a slanted space into a productive and aesthetically pleasing garden. Building a raised garden bed is an effective solution for overcoming these challenges and is a simple yet rewarding project for any gardener.
1. Planning and Preparation
Before breaking ground, thoughtful planning is crucial. Assess the slope and determine the optimal placement for your raised bed. Consider the following factors:
- Sunlight: Locate your bed in an area that receives at least six hours of direct sunlight per day.
- Drainage: Ensure the bed is not in a low-lying area prone to waterlogging. A slight slope away from the bed will aid drainage.
- Accessibility: Choose a location that allows easy access for planting, weeding, and harvesting.
- Size and Shape: Decide on the dimensions of your bed, taking into account available space and the types of plants you want to grow.
Once you've determined the location, mark out the bed's perimeter with stakes and string. Depending on the slope's severity, you may need to adjust the bed's dimensions to ensure stability. For instance, a steeper slope might necessitate a shorter, wider bed.
2. Building the Raised Bed
There are several materials suitable for constructing raised garden beds, each with its own advantages and disadvantages. Popular options include:
- Wood: Treated lumber is the most common material, offering durability and affordability. However, it's essential to use pressure-treated wood specifically designed for outdoor use to prevent it from decaying quickly.
- Stone: Stone offers a more permanent and elegant option, but it requires more labor and skill to build. Consider using readily available local stones for a natural and rustic look.
- Concrete Blocks: Concrete blocks are durable, long-lasting, and readily available. They also provide a more stable structure, especially on steep slopes.
- Recycled Materials: Utilize repurposed materials like old pallets, bricks, or even metal barrels to create a unique and sustainable garden bed.
After choosing your preferred material, you need to prepare the bed's foundation. For wooden or stone beds, level the ground where the bed will be placed and create a firm base with gravel or compacted soil. For concrete block beds, you might need to create a concrete foundation for added stability.
Constructing the Bed
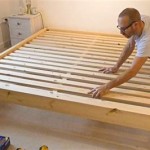
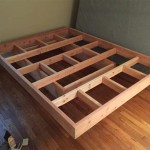
Start by building the bed's base around the marked perimeter. For rectangular beds, ensure that the corners are square using a carpenter's square. Use screws or nails to secure the base pieces together. For curved or irregular shapes, carefully measure and cut your chosen material to fit the desired design.
Once the base is in place, construct the sides of the bed. For wooden beds, cut the side boards to the desired height and secure them to the base, ensuring that they are level and plumb. For stone beds, arrange the stones in a stable and aesthetically pleasing manner, securing them with mortar. For concrete block beds, stack the blocks according to your design, using mortar or concrete to bond them together.
3. Filling and Planting
When the bed is complete, fill it with a quality growing medium. Consider using a blend of compost, topsoil, and peat moss to create a rich and fertile environment. Don't forget to add slow-release fertilizer before planting.
You may also need to address drainage concerns. For steep slopes, creating a drainage layer at the bottom of the bed can be beneficial. Consider using perforated drainage pipe or simply layering small gravel stones before adding the soil.
Once the bed is filled, you can start planting. Choose your planting method based on your chosen plants and the slope's severity. For less steep slopes, planting directly into the raised bed is typically fine. For steeper slopes, consider using raised planting containers or building small terraces within the bed for more manageable planting.
After planting, ensure proper watering and maintenance. Regular watering is essential, particularly during dry spells. Mulching around the plants will help retain moisture and prevent weeds.
Raised garden beds offer numerous advantages for cultivating on sloped ground, including improved drainage, soil fertility, and accessibility. By following these steps and taking into account the specific challenges of your slope, you can create a thriving garden that enhances both the beauty and functionality of your landscape.

How To Make Raised Garden Bed In Slope Area Step By Idea For Beginners Gardening Nitha Kitchen

How To Build An Organic Raised Bed On A Sloped Yard Deeply Southern Home

How To Build Raised Garden Beds On A Slope

Diy Terraced Raised Bed Perfect Solution For Sloped Gardens

How To Build Raised Garden Beds On A Slope Or Hillside Easy Simple And Free

Building Raised Beds On A Slope

How To Build A Raised Garden Bed On Slope

How To Build An Organic Raised Bed On A Sloped Yard Deeply Southern Home

How To Build Raised Garden Beds On A Slope

How To Make Raised Garden Bed In Slope Area Step By Idea For Beginners Gardening Nitha Kitchen
Related Posts