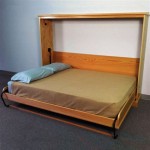
How to Effortlessly Build a Queen Size Platform Bed Frame with Storage
Transform your bedroom into a sanctuary of comfort and efficiency with a custom-made queen-size platform bed frame that seamlessly incorporates ample storage space. Embrace the joy of DIY and embark on this simple yet rewarding project that will elevate your sleep experience and maximize your space.
Before embarking on this exciting adventure, gather the following essential materials:
- 1x4 Pine Boards (or similar lumber): 18 pieces (cut to 77.5 inches)
- 1x6 Pine Boards (or similar lumber): 4 pieces (cut to 77.5 inches)
- Plywood (3/4 inch thickness): 1 sheet (cut to 58 inches x 77.5 inches)
- 2x4 Pine Boards (or similar lumber): 8 pieces (cut to 39.25 inches)
- Pocket Hole Screws: 250+
- Wood Glue
- Clamps
- Drill
- Kreg Jig (or similar pocket hole jig)
- Circular Saw
- Measuring Tape
- Corner Clamps
- Sandpaper or Sanding Block
- Wood Finish (optional)
With your materials assembled, let's delve into the step-by-step guide to building your queen-size platform bed frame with storage:
Step 1: Construct the Side Rails
Begin by creating the side rails. Join two 1x4 boards together using wood glue and pocket hole screws, ensuring they are flush at the edges. Repeat this process for the other side rail.
Step 2: Assemble the Headboard and Footboard
For the headboard and footboard, connect three 1x4 boards together using wood glue and pocket hole screws, again ensuring they are flush at the edges.
Step 3: Attach the Headboard and Footboard
Position the headboard and footboard parallel to each other, with the side rails in between. Secure them using wood glue and pocket hole screws.
Step 4: Build the Storage Platform
To create the storage platform, attach 2x4 pine boards to the inside of the side rails and headboard/footboard using wood glue and pocket hole screws. Ensure they are evenly spaced and create a sturdy base for the plywood.
Step 5: Install the Plywood Platform
Carefully place the plywood sheet onto the storage platform and secure it using wood glue and pocket hole screws. Counter-sink the screws slightly below the surface of the plywood.
Step 6: Reinforce the Frame
For added stability, attach 1x6 pine boards along the outer edges of the side rails and headboard/footboard. This will reinforce the frame and prevent sagging.
Step 7: Sand and Finish
Smooth any rough edges or splinters by sanding them down. If desired, apply a wood finish such as paint, stain, or polyurethane to protect and enhance the appearance of your bed frame.
Congratulations! Your custom-made queen-size platform bed frame with storage is now complete. Enjoy the blissful sleep and enhanced storage capacity it provides, adding a touch of elegance and functionality to your bedroom.

How To Build A Queen Size Storage Bed Addicted 2 Diy

Diy Full Or Queen Size Storage Bed Shanty 2 Chic

Diy Queen Bed Frame With Storage Plans Wilker Do S

Diy Platform Bed With Storage

Diy Platform Bed With Storage Modern Builds

Queen Size Platform Bed Frame With Storage Drawers Sawdust Girl

Brandy Scrap Wood Storage Bed With Drawers Queen Ana White

This Minimal House Diy Minimalism Home Improvement

How To Build A Modern Platform Bed For 125 Diy Beautify Creating Beauty At Home

Platform Storage Bed Frame Diy With

