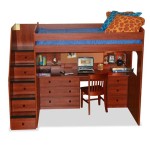
How to Build Your Own Queen Size Loft Bed with Stairs
Building a loft bed is a great way to save space in your bedroom. It's also a fun and rewarding project that you can do yourself. In this article, we'll show you how to build a queen size loft bed with stairs. We'll start with a materials list and then go through the steps of building the bed.
Materials List
- 2x6 lumber for the frame
- 2x4 lumber for the slats
- 3/4-inch plywood for the platform
- 1/2-inch plywood for the stairs
- 1/4-inch plywood for the treads
- Wood screws
- Nails
- Wood glue
- Finishing nails
- Paint or stain
Steps
1. Build the Frame
The first step is to build the frame of the loft bed. This will consist of four posts, two side rails, and two end rails. To build the posts, cut four pieces of 2x6 lumber to the desired height of the bed. Then, cut four pieces of 2x6 lumber to the width of the bed. These will be the side rails. Finally, cut two pieces of 2x6 lumber to the length of the bed. These will be the end rails.
2. Assemble the Frame
Once you have all the pieces cut, it's time to assemble the frame. First, attach the side rails to the posts using wood screws. Then, attach the end rails to the side rails. Make sure that the frame is square before you tighten the screws.
3. Build the Platform
The next step is to build the platform for the bed. To do this, cut a piece of 3/4-inch plywood to the size of the bed. Then, attach the plywood to the frame using wood screws. Make sure that the plywood is flush with the top of the frame.
4. Build the Stairs
Now it's time to build the stairs. To do this, cut two pieces of 1/2-inch plywood to the desired length of the stairs. Then, cut four pieces of 2x4 lumber to the height of the stairs. These will be the stringers for the stairs.
5. Assemble the Stairs
To assemble the stairs, attach the stringers to the plywood using wood screws. Then, cut pieces of 1/4-inch plywood to the size of the treads. Attach the treads to the stringers using wood glue and finishing nails.
6. Finishing Touches
Once the stairs are assembled, you can add any finishing touches you like. You can paint or stain the bed, or you can add decorative details like molding or trim.
Building a loft bed is a great way to save space and add style to your bedroom. By following these steps, you can build a beautiful and functional loft bed that will last for years to come.

Easy Diy Loft Bed With A Desk Queen Size Plans For S Singapore

How To Build An Easy Diy Queen Size Loft Bed For S Thediyplan

How To Build An Easy Diy Queen Size Loft Bed For S Thediyplan

Free Diy Furniture Plans How To Build A Queen Sized Low Loft Bunk Bed The Design Confidential

Diy Queen Loft Bed Frame Plans Rannels Rustic Log Build A Beds Murphy

Multifunctional Queen Size Bunk Bed With Storage Area Plan Singapore

Queen Loft Bed Plans Palmetto Bunk

Loft Bed Build Diy 120 Dollars Queen Size

Loft Frame Simple Plans Available From Their Site Bed Queen Beds

Diy Bunk Beds The Designery
Related Posts