How To Build A Queen Size Bed
Building a queen-size bed is a great way to save money and get exactly the bed you want. It's not as difficult as you might think, and with a little planning and effort, you can build a beautiful and sturdy bed that will last for years to come.
### Materials You'll NeedTo build a queen-size bed, you will need the following materials:
- 8 (2x4) boards, 8 feet long
- 4 (2x6) boards, 8 feet long
- 1 (4x4) post, 8 feet long
- 1 piece of plywood, 60 inches x 80 inches
- 1 box of 3-inch wood screws
- 1 box of 1-1/2-inch wood screws
- Wood glue
- Sandpaper
- Paint or stain (optional)
You will also need the following tools:
- Circular saw
- Miter saw
- Drill
- Countersink bit
- Clamps
- Measuring tape
- Level
- Hammer
- Nail set
1. Cut the wood.
Using the circular saw, cut the following pieces of wood:
- 4 (2x4) boards to 84 inches long
- 4 (2x4) boards to 60 inches long
- 4 (2x6) boards to 84 inches long
- 4 (2x6) boards to 60 inches long
- 1 (4x4) post to 84 inches long
2. Assemble the headboard and footboard.
Apply wood glue to the ends of the (2x4) boards and clamp them together to form the headboard and footboard. Reinforce the joints with 3-inch wood screws. Countersink the screws so that the heads are flush with the surface of the wood.
3. Assemble the side rails.
Apply wood glue to the edges of the (2x6) boards and clamp them together to form the side rails. Reinforce the joints with 3-inch wood screws. Countersink the screws so that the heads are flush with the surface of the wood.
4. Attach the side rails to the headboard and footboard.
Apply wood glue to the ends of the side rails and clamp them to the headboard and footboard. Reinforce the joints with 3-inch wood screws. Countersink the screws so that the heads are flush with the surface of the wood.
5. Attach the legs.
Apply wood glue to the bottom of the (4x4) post and attach it to the center of the footboard. Reinforce the joint with 3-inch wood screws. Countersink the screws so that the heads are flush with the surface of the wood. Repeat this process to attach the other three legs to the headboard and side rails.
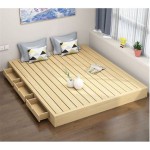
6. Attach the plywood platform.
Apply wood glue to the top of the side rails and legs, and then place the plywood platform on top. Reinforce the joints with 1-1/2-inch wood screws. Countersink the screws so that the heads are flush with the surface of the wood.
7. Sand and finish.
Sand the entire bed to smooth out any rough edges. You can then paint or stain the bed to match your décor.
### Tips- Use a level to make sure that the bed is level before you attach the plywood platform.
- Countersink the screws so that the heads are flush with the surface of the wood. This will help to prevent the screws from snagging on your sheets or blankets.
- If you want to add a headboard or footboard to the bed, you can do so after you have assembled the basic frame.

Plans Queen Size Bed Plan Project Small Wood Projects From Scrap Frame Diy

Queen X Barn Door Farmhouse Bed Plan Her Tool Belt

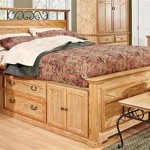
Diy Full Or Queen Size Storage Bed Shanty 2 Chic

How To Build A Queen Size Storage Bed Addicted 2 Diy

Diy Bed Frame Wood Headboard 1500 Look For 200 A Piece Of Rainbow

How To Build A L Shaped Desk Mid Century Modern Diy Builds

Diy Queen Bed Frame Projects Plans

Essential Platform Bed Frame Ana White

How To Build A Queen Size Storage Bed Addicted 2 Diy

Queen Size Platform Bed Frame With Storage Drawers Sawdust Girl