How to Build a Floating Queen Bed
Building a floating queen bed can add a touch of elegance and sophistication to your bedroom. A floating bed is suspended a few inches above the floor, giving it the illusion of floating in mid-air. This type of bed can be a great addition to any modern or contemporary bedroom.
Building a floating queen bed is not as difficult as it may seem. With a few simple tools and some basic woodworking skills, you can build your own floating queen bed in a weekend.
Materials
- 1 sheet of 3/4-inch plywood (4' x 8')
- 4 legs (4" x 4" x 36")
- 1 piece of 1" x 6" lumber (8')
- 1 piece of 1" x 4" lumber (8')
- Wood screws
- Wood glue
- Finishing nails
- Paint or stain (optional)
Tools
- Circular saw
- Miter saw
- Drill
- Countersink bit
- Hammer
- Nail gun (optional)
- Clamps
- Level
- Measuring tape
Instructions
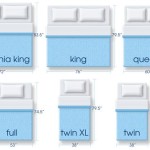
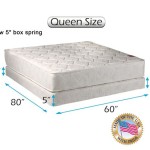
1. Cut the plywood to size. The plywood will be the base of your bed. Cut it to the size of a queen bed, which is 60" x 80".
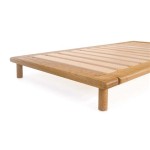
2. Attach the legs to the plywood. The legs will be placed at the corners of the plywood. Attach them with wood screws and wood glue.
3. Build the frame. The frame will be made from the 1" x 6" and 1" x 4" lumber. Cut the 1" x 6" lumber into four pieces that are 60" long. Cut the 1" x 4" lumber into four pieces that are 80" long.
4. Assemble the frame. Attach the 1" x 6" pieces to the 1" x 4" pieces with wood screws and wood glue. Make sure that the frame is square.
5. Attach the frame to the plywood. Place the frame on top of the plywood and secure it with wood screws and wood glue.
6. Countersink the screws. Once the frame is attached, countersink the screws with a countersink bit. This will help to hide the screws.
7. Fill the nail holes. Fill the nail holes with wood filler and let it dry.
8. Sand the bed. Once the wood filler is dry, sand the bed to smooth it out.
9. Paint or stain the bed. If desired, paint or stain the bed to match your bedroom decor.
10. Enjoy your new floating bed! Once the bed is dry, it is ready to use. Enjoy your new floating queen bed!

How To Build A Diy Floating Bed For Queen Size Mattress Thediyplan

Diy Queen Size Floating Bed Howtospecialist How To Build Step By Plans Frame

Floating Queen Size Platform Bed Plans Howtospecialist How To Build Step By Diy Frame

Queen Size Diy Floating Bed Frame

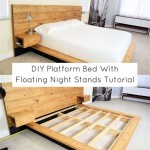
Queen Diy Platform Bed With Floating Night Stands

Queen Size Floating Bed Plans

Diy Queen Size Floating Bed Howtospecialist How To Build Step By Plans Frame

Floating Bed For Queen Size Mattress Thediyplan

Floating Queen Size Platform Bed Plans Howtospecialist How To Build Step By Diy Frame

Floating Queen Size Platform Bed Plans Howtospecialist How To Build Step By Diy
Related Posts