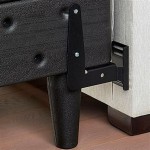
How to Build a Floating Bed Frame
A floating bed frame, also known as a platform bed frame, is a popular choice for modern bedrooms. Its sleek, minimalist design creates a sense of airiness and openness, while still providing a sturdy and supportive base for your mattress. Building a floating bed frame is a rewarding DIY project that can significantly enhance the style of your bedroom. This article will guide you through the process, providing clear and concise instructions to help you achieve this modern aesthetic in your home.
Choosing the Right Materials
The choice of materials for your floating bed frame is crucial for its aesthetics, strength, and durability. Here are some common options:
- Wood: This is a classic choice for bed frames, offering a natural and warm look. Common wood options include pine, oak, and walnut, each with its unique characteristics and price point.
- Metal: Metal frames provide a contemporary and industrial feel. Steel is durable and sturdy, while aluminum is lighter and easier to work with.
- Plywood: Plywood is a budget-friendly option that offers good stability and can be stained or painted to match your decor.
Consider the weight of your mattress and other factors like desired height and style when selecting the material. It's also advisable to consult with a hardware store or lumberyard for recommendations based on your specific needs.
Essential Tools and Equipment
Before embarking on your DIY project, ensure that you have the necessary tools and equipment readily available. This will make the construction process smoother and more efficient.
- Measuring tape: Essential for accurate measurements of the bed frame dimensions.
- Saw: A circular saw or a miter saw is ideal for cutting wood accurately. If working with metal, a metal-cutting chop saw or a band saw will be necessary.
- Drill and drill bits: For creating pilot holes and driving screws. Use appropriate bits for the material you've chosen.
- Screwdriver: For tightening screws and assembling the frame.
- Level: Ensures that the bed frame is level and stable.
- Clamps: To hold pieces in place while assembling.
- Sandpaper: For smoothing out rough edges and preparing the surface for finishing.
- Safety gear: Wear safety glasses, gloves, and dust masks to protect yourself during the construction process.
Detailed Construction Steps
Building a floating bed frame involves several key steps. Follow these instructions carefully to ensure a successful and aesthetically pleasing result:
Step 1: Determine Bed Frame Dimensions
Measure the dimensions of your mattress and add a few inches to each side for the frame's overall width and length. This will ensure that the mattress fits comfortably and is supported adequately.
Step 2: Cut the Frame Components
Using your chosen materials and the measured dimensions, cut the necessary components for the bed frame. This typically includes the side rails, headboards, and footboards. If creating a headboard and footboard, ensure they are cut to the desired height. Remember to take into account the thickness of the materials when calculating the overall length.
Step 3: Assemble the Frame
Once the pieces are cut, assemble the frame by joining the side rails, headboards, and footboards using screws, glue, or other appropriate fasteners. Ensure all joints are secure and level. If using wood, consider pre-drilling pilot holes to prevent splitting. For metal, use appropriate metal screws or rivets.
Step 4: Install Support Slats
Support slats are essential for providing a stable and even surface for your mattress. They are typically spaced 8-12 inches apart, depending on the mattress weight and material. You can use wooden slats, metal slats, or even slats constructed from plywood. Install the slats securely across the frame, ensuring they are aligned properly.
Step 5: Add Finishing Touches
After the frame is assembled, apply a finishing touch to enhance its appearance. This might involve sanding, staining, painting, or adding decorative elements like molding or metal accents. Choose a finishing technique that complements your bedroom's style and your personal taste.
Remember, it's crucial to use high-quality materials and fasteners for a durable and stable bed frame. Take pride in your craftsmanship, and don't be afraid to customize your design to match your unique bedroom preferences.

King Size Floating Bed Frame Easily Build Your Own

Diy Floating Bed Frames How To Design Plan And Build Them From Scratch

How To Build A Floating Bed Bedroom Reno Part 5

King Size Floating Bed Frame Easily Build Your Own Plans Diy

How To Make A Floating Bed Time Lapse

Floating Bed Frame Digital Plans

How To Build A Floating Bed Frame For 100 Diy Floatingbed Life Diybedframe

20 Ways To Build A Diy Floating Bed Frame With Ease Platform

Floating Bed For Queen Size Mattress Thediyplan

This Minimal House Diy Minimalism Home Improvement
Related Posts


