How to Assemble a Split King Sleep Number Bed
Assembling a Split King Sleep Number bed may seem daunting, but with careful attention to the provided instructions and a systematic approach, the process becomes manageable. This guide breaks down the assembly into key steps, facilitating a smoother setup experience.
Preparing for Assembly
Adequate preparation is crucial for a successful assembly. Clear a spacious area in the bedroom, ensuring enough room to maneuver and lay out all the components. Gather necessary tools, typically including a wrench or screwdriver, although Sleep Number beds often come with specialized tools. Unpack all boxes carefully, identifying each part and consulting the provided inventory list. Finally, have the assembly manual readily available for easy reference throughout the process.
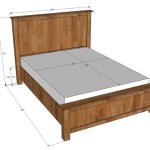
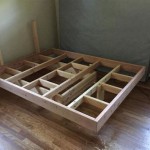
Assembling the Modular Bases (if applicable)
Some Split King Sleep Number beds utilize modular bases. If this applies to the chosen model, begin by connecting the individual base sections. Typically, this involves aligning the sections and securing them together using provided connectors or locking mechanisms. Ensure proper alignment and a secure connection before proceeding. Consult the assembly manual for model-specific instructions related to the base assembly, paying attention to cable management for powered bases.
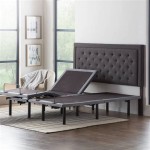
Setting Up the FlexFit™ Adjustable Base (if applicable)
For models with the FlexFit™ adjustable base, the assembly process requires additional steps. Position each base segment where desired, ensuring adequate spacing for each side of the split king setup. Connect the power cords to each base and then to a nearby outlet. Sync the bases using the provided remote or the Sleep Number app, following the pairing instructions in the user manual. Test the base functionality, ensuring smooth and synchronized movement.
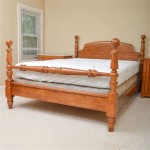
Inflating the Air Chambers
Once the bases are set up, carefully unpack the air chambers. Lay each air chamber on its respective base, ensuring correct orientation. Connect the air hoses to the chambers, ensuring a tight fit to prevent leaks. Plug in the pump unit and begin inflating the chambers. Monitor the inflation process, referring to the manual for recommended firmness levels or using the Sleep Number app for personalized settings. Allow the chambers to fully inflate before proceeding.
Attaching the Top Cover
With the air chambers inflated, carefully unfold and position the provided top cover over the air chambers. Ensure even distribution and proper alignment of the cover. Some models may have straps or fasteners to secure the top cover to the air chambers, preventing slippage. Smooth out any wrinkles or creases for a comfortable sleeping surface.
Adding the Comfort Layers (if applicable)
Sleep Number beds often include additional comfort layers such as mattress toppers or pads. Place these layers on top of the fitted cover, ensuring even distribution. Smooth out any wrinkles or folds. These layers enhance comfort and can be easily removed for cleaning or replacement.
Connecting Wireless Features (if applicable)
Many Sleep Number beds offer wireless connectivity for features like sleep tracking and personalized comfort adjustments. If the model includes wireless capabilities, download the Sleep Number app and follow the provided instructions to connect the bed to the home Wi-Fi network. This step allows for personalized sleep settings and access to sleep data insights.
Final Inspection and Testing
Once all components are assembled and connected, perform a final inspection. Check for any loose connections, proper alignment of all components, and ensure the bed functions as expected. Test the adjustable base features (if applicable), confirm the remote functionality, and verify the firmness of the air chambers. Consult the troubleshooting section of the manual for any issues encountered.

Split Top Mattress And Adjustable Assembly

Slideshow Of My Sleep Number P5 Split King With Flexfit 2 Base Factory Install

Building A Sleep Number Bed Ile

Sleep Number P5 Bed Unbox Assembly

How To Assemble A Sleep Number Bed 11 Steps Smart Sleeping Tips

M7 Smart Bed Sleep Number

Adjustable Base And Mattress Assembly Instructions

Using The 12 On Traditional Remote With My Bed Sleep Number

Assemble Sleep Number 360 Smart Mattress Flexfit Adjustable Base

Sleep Number Split King Size Premium Adjustable Bed Set Qvc Com