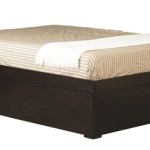
How Do You Make a Queen Size Floating Bed Frame?
Floating bed frames have become increasingly popular in recent years due to their sleek and modern appearance. They give the illusion that your bed is floating just above the floor, creating a sense of space and weightlessness. Building your own queen-size floating bed frame is a relatively simple project that can be completed in a weekend with the right tools and materials.
Materials You'll Need:
- 2x6 pine lumber (8 pieces, each 60 inches long)
- 2x4 pine lumber (12 pieces, each 30 inches long)
- Wood screws (2-inch and 3-inch)
- Drill
- Countersink bit
- Sandpaper or sanding block
- Wood filler
- Paint or stain (optional)
Step-by-Step Instructions:
1. Build the Side RailsBegin by assembling the two side rails. Take two 2x6 pine planks and place them parallel to each other, 60 inches apart. Using 2-inch wood screws, secure three 2x4 planks perpendicularly across the two 2x6 planks, spacing them evenly.
2. Attach the Header and Footer BoardsTake two 2x6 pine planks and cut them to a length of 60 inches. These will be the header and footer boards. Place them at the ends of the side rails, flush with the edges. Secure them using 2-inch wood screws.
3. Install the Support SlatsCut six 2x4 pine planks to a length of 54 inches. These will act as support slats for the bed platform. Place them evenly spaced across the inside of the frame, resting on the side rails. Secure them using 2-inch wood screws.
4. Reinforce the FrameFor added strength, attach two additional 2x4 pine planks diagonally across the frame, running from the header to the footer board. Secure them using 2-inch wood screws.
5. Prepare the SurfaceLightly sand the entire frame to smooth out any rough edges. Fill any holes or gaps with wood filler and allow it to dry.
6. Paint or Stain (Optional)If desired, you can paint or stain the frame to match your bedroom decor. Allow ample time for the finish to dry.
7. Install the Bed PlatformPlace a piece of plywood or MDF cut to the size of the frame (60x80 inches) on top of the support slats. Secure it using 3-inch wood screws.
8. Enjoy Your Floating BedCongratulations! You have successfully built your own queen-size floating bed frame. Place your mattress and bedding on top, and enjoy the illusion of a floating bed in your bedroom.
Tips:
- Use a level to ensure that the frame is level before attaching the bed platform.
- Countersink the screws slightly below the surface of the wood to create a smooth finish.
- If you want a more rustic look, you can use reclaimed wood or leave the frame unfinished.
- Consider adding LED strip lights to the underside of the bed frame for a dramatic effect.

Diy Queen Size Floating Bed Howtospecialist How To Build Step By Plans Frame

How To Build A Diy Floating Bed For Queen Size Mattress Thediyplan

Floating Queen Size Platform Bed Plans Howtospecialist How To Build Step By Diy Frame

Diy Queen Size Floating Bed Howtospecialist How To Build Step By Plans

Queen Size Diy Floating Bed Frame

Queen Size Floating Bed Plans

Floating Queen Size Platform Bed Plans Howtospecialist How To Build Step By Diy Frame

Floating Bed For Queen Size Mattress Thediyplan

Diy Floating Bed Frames How To Design Plan And Build Them From Scratch

King Size Floating Bed Frame Easily Build Your Own
Related Posts

