Building a King-Size Bed Frame with Storage: An Essential Guide
A bed frame is a crucial part of any bedroom, not only providing support for your mattress but also contributing to the overall aesthetic of the space. Building your own king-size bed frame with storage is an excellent DIY project that can save you money and give you a sense of accomplishment. Here's a comprehensive guide to help you through every step of the process:
Materials and Tools:
- King-size mattress (for measurements)
- Pressure-treated lumber (4x4s, 2x6s, 1x12s)
- Wood screws (2.5", 3", 4")
- Wood glue
- Circular saw
- Drill
- Impact driver
- Sander
- Measuring tape
- Level
- Clamps
- Finish of your choice (stain, paint, etc.)
Step 1: Planning and Measurements
Start by measuring your king-size mattress to determine the dimensions of the bed frame. Allow for a few extra inches around the perimeter for clearance and support. Plan the design of the frame, including any storage options (e.g., drawers, shelves, headboard with compartments). Sketch out a plan to guide your construction.
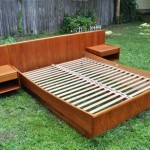
Step 2: Building the Frame
Cut the 4x4s and 2x6s to length according to your plan. Assemble the outer frame by securing the 4x4 legs to the 2x6 side rails and footboard. Reinforce the corners with wood screws and glue. Install the 1x12s perpendicular to the side rails as bed slats, spacing them evenly for mattress support.
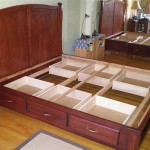
Step 3: Adding Storage
If desired, you can incorporate storage into your bed frame. Drawers can be built using 2x6s and plywood, while shelves can be made from 1x12s. Attach them to the frame using screws and glue, ensuring they are securely fastened.
Step 4: Headboard and Footboard Options
Design and build a headboard and footboard to complete the look of the bed frame. Consider using decorative molding, trim, or fabric to enhance the aesthetics. Attach the headboard to the frame using brackets or bolts.
Step 5: Sanding and Finishing
Sand the entire bed frame to smooth out any rough edges or splinters. Choose a finish of your preference, such as stain, paint, or clear sealant, and apply it as per the manufacturer's instructions. Allow the finish to dry completely.
Step 6: Assembly and Placement
Assemble the frame by connecting the headboard to the base and adding the slats. Place the mattress on the frame and ensure that it fits snugly. Level the bed frame and secure it to the floor if necessary to ensure stability.
Conclusion:
Building your own king-size bed frame with storage is a rewarding project that adds both functionality and style to your bedroom. By following these steps and using quality materials, you can create a sturdy and durable bed frame that will provide years of comfortable sleep and storage solutions. Remember to customize the design to suit your preferences and décor, making it a truly unique piece that reflects your personal taste.

Make A King Sized Bed Frame With Lots Of Storage

Platform Storage Bed Frame Diy With

Diy Storage Bed Printable Woodworking Plans And Tutorial

Diy Storage Bed Printable Woodworking Plans And Tutorial

King X Barn Door Farmhouse Bed Plans Her Tool Belt

Cal King Platform Storage Bed Free Plans Sawdust Girl

Platform Bed With Drawers King Size Frame Diy

Classic Storage Bed King Ana White

Diy Storage Bed Printable Woodworking Plans And Tutorial

King X Barn Door Farmhouse Bed Plans Her Tool Belt