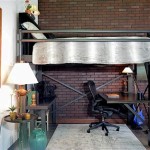
DIY Queen Storage Bed Frame Plans: Elevate Your Bedroom with Style and Functionality
Transform your bedroom into a sanctuary of comfort and organization with a DIY queen storage bed frame. These plans provide a step-by-step guide to building a sturdy and stylish bed frame that will maximize your storage space and elevate your sleep experience.
Materials and Tools Required:
- 2x6 lumber (approximately 12 pieces)
- 2x4 lumber (approximately 6 pieces)
- 3/4-inch plywood (one sheet)
- Wood screws
- Wood glue
- Drill
- Circular saw
- Miter saw
- Level
- Sandpaper
Step-by-Step Instructions:
1. Build the Headboard and Footboard:- Cut the 2x6 lumber into two pieces for the headboard and two pieces for the footboard.
- Attach the 2x4 support legs to the inside of the headboard and footboard using wood screws.
- Secure the plywood to the headboard and footboard using wood screws.
- Cut the 2x6 lumber into four pieces for the side rails.
- Attach the 2x4 support legs to the ends of the side rails using wood screws.
- Place the headboard on the floor and attach the side rails to it using wood screws.
- Lift the footboard into place and attach it to the side rails using wood screws.
- Ensure that the frame is square and level.
- Cut the 2x4 lumber into the desired lengths for the drawer frames. The length should be equal to the width of the bed minus the thickness of the side rails.
- Assemble the drawer frames by attaching the 2x4s together with wood screws.
- Determine the placement of the drawer slides on the side rails.
- Attach the drawer slides to the side rails using the provided screws.
- Cut the plywood into the desired sizes for the drawer bottoms, fronts, and backs.
- Assemble the drawers by attaching the plywood pieces together with wood screws.
- Insert the drawers into the drawer frames and test their operation.
- Sand the entire bed frame to smooth out any rough edges.
- Apply paint, stain, or finish to match your desired style.
- Add handles or knobs to the drawers for convenience.
Benefits of a DIY Storage Bed Frame:
* Increased Storage Space: The built-in drawers provide ample storage for bedding, clothes, or other items, making your bedroom more organized. * Sturdy Construction: The frame is made of durable lumber, ensuring its stability and longevity. * Customization: You can design and finish the bed frame to match your bedroom décor and personal preferences. * Cost Savings: Building your own bed frame is significantly cheaper than purchasing a pre-made one, saving you money. * Sense of Accomplishment: Creating your own bed frame from scratch is a rewarding experience that will give you a sense of pride.
Queen Size Platform Bed Frame With Storage Drawers Sawdust Girl

How To Build A Queen Size Storage Bed Addicted 2 Diy

Queen Size Platform Bed Frame With Storage Drawers Sawdust Girl

Full Size Bed Designs Diy Storage Platform Frame

Classic Storage Bed Queen Ana White

How To Build A Queen Size Storage Bed Addicted 2 Diy Frame With

Farmhouse Storage Bed With Drawers Queen Ana White

Queen Size Platform Bed Frame With Storage Drawers Sawdust Girl

Queen Size Storage Bed Plans Howtospecialist How To Build Step By Diy Frame

Farmhouse Storage Bed With Drawers Queen Diy Frame
