Creating Your Own Queen-Size Bed Frame: A Comprehensive Guide for DIY Enthusiasts
Crafting a sturdy and stylish queen-size bed frame from scratch is a rewarding project that can upgrade your bedroom decor and provide years of comfortable sleep. Engage in this comprehensive guide to discover every essential aspect of building your own bed frame, ensuring a smooth and successful process.
Materials and Tools Required
Before embarking on this project, gather the necessary materials and tools. You will need:
- 8-foot 4x4 lumber for the legs and side rails (6 pieces)
- 6-foot 2x4 lumber for the headboard and footboard (2 pieces)
- 8-foot 1x4 pine boards for the slats (16 pieces)
- Wood screws (3 inches and 2 inches)
- Wood glue
- Corner clamps
- Drill
- Circular saw or miter saw
- Measuring tape
- Level
Step-by-Step Instructions
Once you have everything you need, follow these step-by-step instructions:
- Build the Headboard and Footboard: Cut the 2x4 lumber to the desired height of your headboard (e.g., 36 inches) and footboard (e.g., 18 inches). Use wood glue and screws to assemble them.
- Create the Side Rails: Cut the 4x4 lumber into two 8-foot and four 6-foot pieces. The 8-foot pieces will be the long side rails, while the 6-foot pieces will be the short side rails.
- Assemble the Main Frame: Place the long side rails parallel to each other, spaced 60 inches apart. Position the short side rails perpendicular to the long side rails, 8 inches from the ends. Secure all connections with wood glue and screws, using corner clamps for extra rigidity.
- Add the Slats: Cut the 1x4 pine boards into 60-inch lengths. Lay the slats across the side rails, spacing them evenly. Screw them securely into place.
- Attach the Headboard and Footboard: Position the headboard against the top of the long side rails and the footboard against the bottom. Secure them with wood screws.
Finishing Touches
To complete your bed frame, consider these finishing touches:
- Sanding and Painting: Smooth any rough edges with sandpaper. Apply paint, stain, or sealant to protect the wood and enhance its appearance.
- Adding Decorative Elements: Enhance the visual appeal of your bed frame with decorative molding, trim, or fabric upholstery on the headboard and footboard.
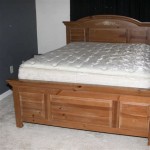
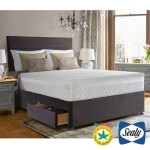
- Adding a Box Spring or Foundation: Place a box spring or bed foundation on top of the slats to provide support and cushioning for your mattress.
Conclusion
Congratulations on completing your DIY queen-size bed frame! You have crafted a durable, stylish, and customized piece that will elevate your bedroom and provide years of restful sleep. Enjoy the satisfaction of having built your own bed frame, showcasing your carpentry skills and creativity.

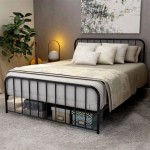
Essential Platform Bed Frame Ana White

Diy Bed Frame Wood Headboard 1500 Look For 200 A Piece Of Rainbow

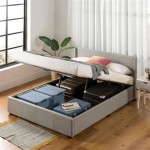
Diy Full Or Queen Size Storage Bed Shanty 2 Chic

How To Build A L Shaped Desk Mid Century Modern Diy Builds

How To Build A Modern Platform Bed For 125 Diy Beautify Creating Beauty At Home

Plans Queen Size Bed Plan Project Small Wood Projects From Scrap Frame Diy

How To Build A Modern Platform Bed For 125 Diy Beautify Creating Beauty At Home

Essential Platform Bed Frame Ana White

Diy Bed Frame Wood Headboard 1500 Look For 200 A Piece Of Rainbow

Queen X Barn Door Farmhouse Bed Plan Her Tool Belt