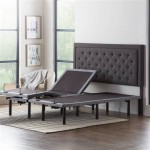
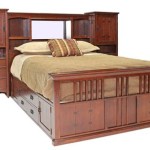
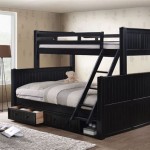
DIY Queen Bed Frame with Lift Up Storage
Building a DIY queen bed frame with lift-up storage offers a practical solution for maximizing bedroom space, especially in smaller homes or apartments. This project combines woodworking skills with a functional design, resulting in a custom-built bed frame tailored to individual needs and aesthetic preferences.
Planning and Design
Careful planning is crucial for a successful DIY bed frame project. Begin by determining the exact dimensions of the queen-size mattress to ensure a proper fit. Consider the desired height of the bed frame, accounting for the storage space underneath. Sketching a detailed plan with accurate measurements for all components, including the frame, slats, and lift mechanism, is essential. This visual representation will serve as a guide throughout the construction process.
Material Selection
Choosing appropriate materials is key to the bed frame's durability and stability. High-quality wood, such as pine, plywood, or MDF, is recommended for the frame construction. The thickness of the wood should be sufficient to support the weight of the mattress, occupants, and stored items. For the lift mechanism, opt for heavy-duty gas struts or hinges specifically designed for bed frames. These components will ensure smooth and effortless lifting and lowering of the storage compartment.
Construction of the Frame
The construction process begins with cutting the wood pieces according to the planned dimensions. Precise cuts are crucial for achieving a square and stable frame. Assemble the frame using wood screws and wood glue, ensuring tight joints and proper alignment. Reinforce the corners with corner braces for added strength and stability. This will prevent the frame from wobbling or shifting over time.
Integrating the Lift Mechanism
Attach the chosen lift mechanism to the frame and the bed base. Carefully follow the manufacturer's instructions for proper installation and adjustment. The lift mechanism should be securely fastened to ensure safe and reliable operation. Test the mechanism's movement to ensure smooth lifting and lowering without binding or resistance. Adjust the gas struts or hinges as needed to achieve the desired level of support and ease of use.
Building the Storage Compartment
Construct the storage compartment within the frame using plywood or MDF. The compartment's dimensions should maximize the available space while allowing easy access to stored items. Consider adding dividers or compartments within the storage area for better organization. This will help keep the space tidy and prevent items from shifting around when the bed is lifted.
Adding the Slats
Install wooden slats across the frame to support the mattress. These slats should be evenly spaced and securely fastened to the frame to provide adequate support and prevent sagging. The spacing between the slats should be appropriate for the type of mattress being used. Consult the mattress manufacturer's recommendations for optimal slat spacing.
Finishing Touches
Once the frame is assembled, sand all surfaces smooth and apply a desired finish. Painting or staining the frame adds a protective layer and enhances the aesthetic appeal. Choose a finish that complements the existing bedroom decor. Consider adding features like a headboard or footboard to personalize the design. Upholstering the headboard adds a touch of comfort and style.

How To Build A Queen Size Storage Bed Addicted 2 Diy

How To Build A Queen Size Storage Bed Addicted 2 Diy

Queen Size Bed With Storage

Diy Platform Bed Lift Kit The Bedroom Storage Solution Cs Hardware Blog

Diy Storage Bed With Gas Spring Assist

How To Build A Queen Size Storage Bed Addicted 2 Diy

Diy Platform Bed With Drawers Easy To Build Beds Perfect For Any Home Diyplatformbed Plat Frame Plans

Storage Bed Frame And Lift Kits Diy Platform With

How To Build A Queen Size Storage Bed Addicted 2 Diy

Diy Platform Bed With Storage Хранение постельных принадлежностей Кровать с местом для хранения Деревянные кровати