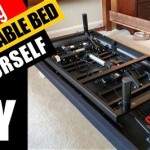
DIY High Queen Bed Frame: A Step-by-Step Guide to Building Your Own
Building your own high queen bed frame is a great way to save money and add a personal touch to your bedroom. It's also a surprisingly easy project that can be completed in a weekend. Here's a step-by-step guide to help you get started:
Materials:
- 2x6 lumber (8 pieces cut to 84 inches long)
- 2x4 lumber (8 pieces cut to 60 inches long)
- 1x6 lumber (8 pieces cut to 84 inches long)
- 1x4 lumber (8 pieces cut to 60 inches long)
- Wood screws
- Wood glue
- Clamps
Tools:
- Circular saw or miter saw
- Drill
- Countersink bit
- Level
- Tape measure
- Sandpaper
Instructions:
1. Assemble the Side Rails
Begin by laying out two of the 2x6 boards parallel to each other. Space them 60 inches apart, which will be the width of your bed frame. Clamp the boards together and drill two pilot holes through the top of one board into the other. Countersink the holes and drive in two wood screws. Repeat this process to attach the remaining two 2x6 boards to create the other side rail.
2. Assemble the Headboard and Footboard
Cut two of the 2x4 boards to 84 inches long for the headboard and footboard. Lay out the headboard board on a flat surface and attach the 1x6 boards to the front using wood glue and screws. Space the 1x6 boards evenly across the headboard. Repeat this process to create the footboard.
3. Attach the Side Rails to the Headboard and Footboard
Place the headboard on its side and align it with the end of one of the side rails. Clamp the side rail to the headboard and drill two pilot holes through the side rail into the headboard. Countersink the holes and drive in two wood screws. Repeat this process to attach the other side rail to the footboard.
4. Add the Slats
Cut the 1x4 boards to 60 inches long and lay them across the side rails, spacing them evenly. Secure the slats to the side rails using wood screws. Make sure the slats are flush with the top of the side rails.
5. Sand and Finish
Sand the entire bed frame to smooth any rough edges. You can then paint or stain the bed frame to match your decor. Once the finish is dry, your high queen bed frame is complete.
Tips:
- Use a level to ensure that the side rails are level and the headboard and footboard are plumb.
- Pre-drill all pilot holes to prevent the wood from splitting.
- Countersink the screws slightly below the surface of the wood to create a smooth finish.
- If you don't have a circular saw or miter saw, you can have the lumber cut to size at your local home improvement store.

Diy Bed Frame Wood Headboard 1500 Look For 200 A Piece Of Rainbow

Easy To Build Diy Bed Houseful Of Handmade

Diy Bed Frame Wood Headboard 1500 Look For 200 A Piece Of Rainbow

Diy Bed Frame Plans How To Make A With Pete

Diy Hanging Bed Jenna Sue Design

Diy Bed Frame Wood Headboard 1500 Look For 200 A Piece Of Rainbow

Diy Bed Frame Angela Marie Made

47 Diy Bed Frame Ideas Built With Pipe Simplified Building

Diy Bed Frame Angela Marie Made

Diy Bed Frame Wood Headboard 1500 Look For 200 A Piece Of Rainbow