Dalton Queen Espresso Storage Bed Instructions
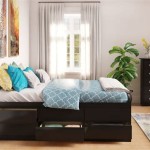
The Dalton Queen Espresso Storage Bed is a stylish and functional piece of furniture that offers ample storage space. Its espresso finish adds a touch of elegance to any bedroom, while the storage compartments provide a convenient solution for keeping your belongings organized. This article will guide you through the assembly process, outlining the essential steps and offering helpful tips to ensure a smooth and successful installation.
Step 1: Unpacking and Inspecting the Components
Before you begin assembling the bed, take the time to unpack all the components carefully. Ensure that all the parts are present and accounted for. Refer to the parts list provided in the instruction manual to verify that you have everything you need. Once you've unpacked the components, inspect them for any damage or defects. If you find any issues, contact the manufacturer immediately.
Step 2: Assembling the Bed Frame
The first step in assembling the Dalton Queen Espresso Storage Bed is to construct the bed frame. Begin by laying out the headboard, footboard, and side rails on a flat surface. Align the headboard and footboard, ensuring that the holes for the connecting hardware are matched up. Use the provided bolts and wrenches to securely fasten the headboard and footboard to the side rails. Tighten the bolts firmly to ensure that the frame is stable and secure.
Step 3: Attaching the Storage Base
Once the bed frame is assembled, you can attach the storage base. The storage base is typically a platform that slides into the frame and provides a solid foundation for the mattress. Align the storage base with the frame, making sure that the holes for the connecting hardware match up. Use the provided bolts and wrenches to secure the storage base to the frame. It's essential to tighten the bolts firmly to ensure that the storage base is securely attached and will not move or detach while the bed is in use.
Step 4: Installing the Mattress Support
Most storage beds come with a built-in mattress support system, which provides a stable platform for the mattress and helps prevent sagging. Carefully align the mattress support system with the frame and storage base. Use the provided bolts and wrenches to secure the mattress support system to the frame and storage base. Make sure that the mattress support system is level to ensure a comfortable sleeping surface.
Step 5: Attaching the Headboard and Footboard
In some cases, the headboard and footboard may be assembled separately and then attached to the bed frame. If this is the case, follow the instructions provided in the manual. Carefully align the headboard and footboard with the frame, ensuring that the holes for the connecting hardware match up. Use the provided bolts and wrenches to securely fasten the headboard and footboard to the frame. Tighten the bolts firmly to ensure that the headboard and footboard are securely attached and will not move or detach while the bed is in use.
Step 6: Placing the Mattress
Once the bed frame is fully assembled, you can place the mattress on the bed. Carefully lift the mattress and lower it onto the mattress support system. Ensure that the mattress is centered on the bed and that it sits flush with the headboard and footboard.
Step 7: Using the Storage Compartments
The Dalton Queen Espresso Storage Bed includes convenient storage compartments that can be used to keep your belongings organized and out of sight. To access the storage compartments, lift the mattress and remove the storage base. This will reveal the storage compartments underneath. Use the compartments to store linens, seasonal clothing, or any other items you would like to keep out of sight.
Step 8: Cleaning and Maintenance
To keep your Dalton Queen Espresso Storage Bed looking its best, clean it regularly with a damp cloth. Avoid using harsh chemicals or abrasive cleaners, as these can damage the finish. Dust the bed frame, headboard, and footboard regularly to prevent dust accumulation. If the storage base is fabric, you can vacuum it regularly to remove dust and debris. For any stains on the fabric, check the manufacturer's cleaning instructions to determine the best way to remove them.
By following these instructions, you can assemble your Dalton Queen Espresso Storage Bed efficiently and enjoy its stylish design and functional features. The storage compartments are an excellent way to keep your bedroom organized, while the espresso finish adds a touch of elegance to any space. With proper care and maintenance, your Dalton Queen Espresso Storage Bed will provide you with years of comfortable and stylish sleep.

Dalton Storage Bed Castlery Singapore

To Own Elements International Dalton Ii Queen Storage Bed At Aaron S Today

Dalton Queen Espresso Storage Bed Mattress Furniture Headboard Frame And

Dalton Storage Bed Castlery Singapore

Euroco Wood Twin Platform Bed With Headboard 2 Storage Drawers For Kids Espresso Com

Mendocino Queen Panel Storage Bed Costco

Dalton Bed With Harper Side Table Set Castlery Singapore

Fergus King Storage Bed Costco

Platform Storage Bed 2 Drawers With Wheels Twin Size Frame No Box Spring Need Espresso Com
Pacific Grove King Storage Bed Costco
Related Posts