Build a Queen-Size Bed Headboard for a Sophisticated Bedroom
A queen-size bed headboard is a statement piece that can elevate the look of any bedroom. It provides comfort, support, and a touch of elegance. Building your own headboard is a fun and rewarding project that can save you money and add a personal touch to your space.
In this guide, we'll walk you through the essential steps involved in building a queen-size bed headboard. We'll cover everything from choosing the right materials to assembling the final product. Let's get started!
1. Choose the Right Materials
The first step is to select the materials for your headboard. You can choose from a wide range of options, including wood, metal, upholstered fabric, or a combination of materials. Consider the style of your bedroom, the size of your bed, and your budget when making your decision.
2. Determine the Headboard Size
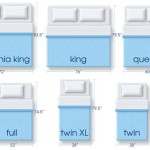
The next step is to determine the size of your headboard. A queen-size bed is typically 60 inches wide, so your headboard should be at least that wide. You can also choose to make it wider or taller to create a more dramatic look.
3. Cut the Headboard Pieces
Once you have determined the size of your headboard, you need to cut the necessary pieces. If you are using wood, you can use a saw to cut the pieces to the desired dimensions. For upholstered fabric, you will need to cut the fabric and batting to the correct size.
4. Assemble the Headboard Frame
The next step is to assemble the frame of your headboard. If you are using wood, you can use screws or nails to connect the pieces. For upholstered fabric, you will need to staple the fabric to the frame.
5. Add Upholstery (Optional)
If you are using upholstered fabric, you will need to add upholstery to the headboard. This can be done by wrapping the batting around the frame and stapling it in place. Once the batting is in place, you can staple the fabric over it.
6. Attach the Headboard to the Wall
The final step is to attach the headboard to the wall. You can do this by using screws or nails. Make sure to use anchors if necessary to ensure that the headboard is securely attached.
7. Add Finishing Touches
Once the headboard is attached to the wall, you can add finishing touches to complete the look. You can paint or stain the headboard, add trim, or hang artwork above it. The possibilities are endless!
Conclusion
Building a queen-size bed headboard is a rewarding project that can add a touch of elegance to any bedroom. By following the steps outlined in this guide, you can create a custom headboard that perfectly complements your space.

Diy Bed Frame Wood Headboard 1500 Look For 200 A Piece Of Rainbow

Diy Bed Frame Wood Headboard 1500 Look For 200 A Piece Of Rainbow

Easy Build Wood Headboard All Mattress Sizes Ana White

Diy Bed Frame Wood Headboard 1500 Look For 200 A Piece Of Rainbow

Queen X Barn Door Farmhouse Bed Plan Her Tool Belt

The Building Of A Bed Queen Frame Plans

How To Build A Diy Simple Queen Headboard Wilker Do S

Diy Bed Frame Wood Headboard 1500 Look For 200 A Piece Of Rainbow

How To Upholster A Headboard For Beginners

50 Best Diy Headboard Ideas Upcycled

