Bellmar Queen Bed Assembly Instructions: A Comprehensive Guide
Assembling a Bellmar queen bed can be a daunting task, but with the right instructions and a bit of patience, you can have your new bed up and running in no time. Here's a detailed guide to help you through the process:
1. Gather Your Tools and Materials
Before you start, make sure you have all the necessary tools and materials. You will need:
* Phillips head screwdriver * Flat head screwdriver * Allen wrench * Hammer * Soft-faced mallet (optional) * Bellmar queen bed frame * Slats * Mattress foundation * Mattress2. Prepare the Bed Frame
Start by laying out the bed frame on a flat surface. Identify the headboard, footboard, and side rails. Connect the side rails to the headboard and footboard using the bolts and nuts provided. Make sure the bolts are tightened securely.
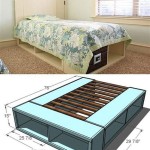
3. Install the Slats
Place the slats evenly across the bed frame, with the wider ends resting on the side rails. Use the screws provided to secure the slats to the frame.
4. Assemble the Mattress Foundation
Most Bellmar queen beds come with a mattress foundation. Assemble the foundation by connecting the side rails and legs using the provided bolts and nuts. Place the foundation on top of the slats.
5. Attach the Headboard and Footboard
Lift the headboard and footboard onto the bed frame and align them with the holes on the side rails. Use the bolts provided to secure the headboard and footboard to the frame.
6. Check Stability
Once the bed is assembled, check its stability by gently rocking it back and forth. If the bed wobbles, tighten the bolts and screws further. You can also use a soft-faced mallet to tap the joints if necessary.
7. Finishing Touches
Place the mattress on the bed frame and adjust the fitted sheet. Make the bed and enjoy your new Bellmar queen bed!
Tips for Success
* Follow the instructions carefully and in order. * Use the correct tools for each task. * Don't overtighten the bolts and nuts. * If you have any questions or difficulties, refer to the manufacturer's instructions or contact customer service. * Be patient and take your time. Assembling a bed can be time-consuming, but it's worth it to ensure a sturdy and comfortable bed.Conclusion
With these clear and comprehensive instructions, you can assemble your Bellmar queen bed with confidence. Whether you're a DIY enthusiast or a first-time assembler, this guide will help you create a comfortable and stylish addition to your bedroom.

Bellmar 3 Piece Queen Bed Driftwood Leon S

Bellmar 3 Piece Queen Bed Grey Leon S

Bellmar 3 Piece Queen Bed Grey Leon S

Bellmar 3 Piece Queen Bed Driftwood Leon S

Bellmar 3 Piece Queen Bed White Leon S

Bellmar 3 Piece Queen Bed Driftwood Leon S

Bellmar Driftwood Bedroom Suite Leon S Furniture Saint John

Bellmar 3 Piece Queen Bed Grey Leon S

Bellmar 3 Piece Full Bed White Leon S

Bellmar 3 Piece Queen Bed White Leon S
Related Posts